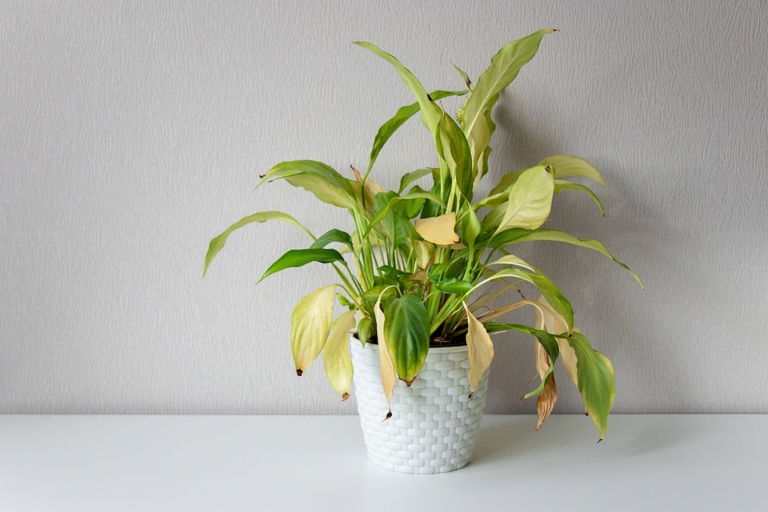
Hydrangea root rot is a serious problem that can kill your plant. There are several signs that your plant is suffering from hydration root rot, including wilting leaves, yellowing leaves, and stunted growth. If you see any of these signs, it’s important to take action immediately. The good news is that there are a few simple steps you can take to save your plant.
Signs of Hydrangea Root Rot
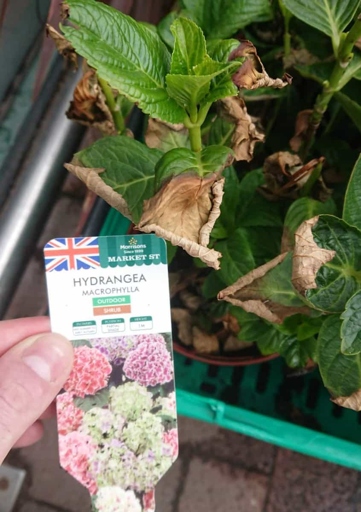
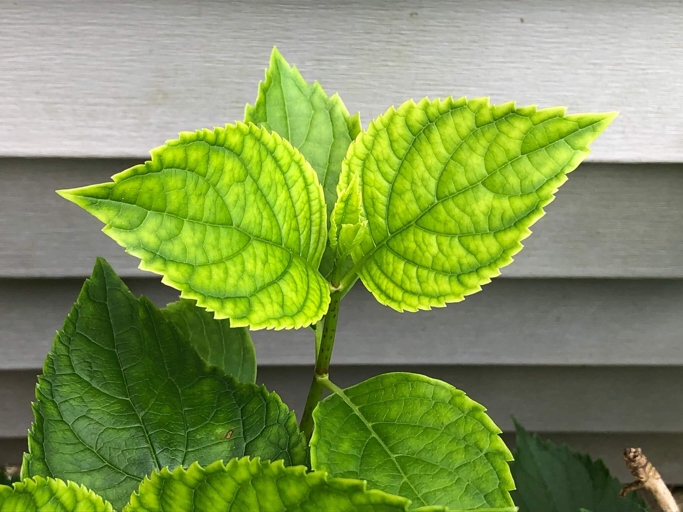
If the leaves of your plant are wilting, it is a sign that the roots are not getting enough water. If you see any of these signs, you should take action to save your plant. The third sign is browning leaves. Hydrangea root rot is a serious problem that can kill your plant. The first sign is wilting leaves. There are several signs that your plant is suffering from this disease. If the leaves of your plant are yellowing, it is a sign that the roots are not getting enough nutrients. The second sign is yellowing leaves. If the leaves of your plant are browning, it is a sign that the roots are rotting.
Causes of Hydrangea Root Rot
Hydrangea root rot is a serious problem that can kill your plant. There are several things that can cause this disease, including overwatering, poor drainage, and compacted soil.
If you think your plant has hyd
How to Save Hydrangea from Root Rot
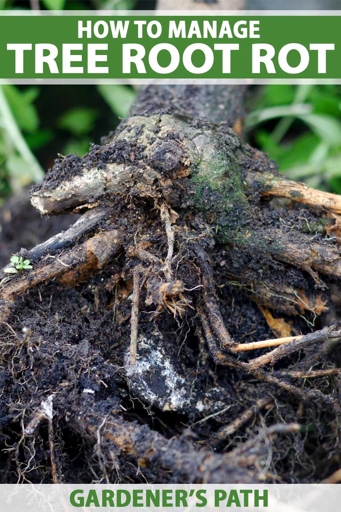
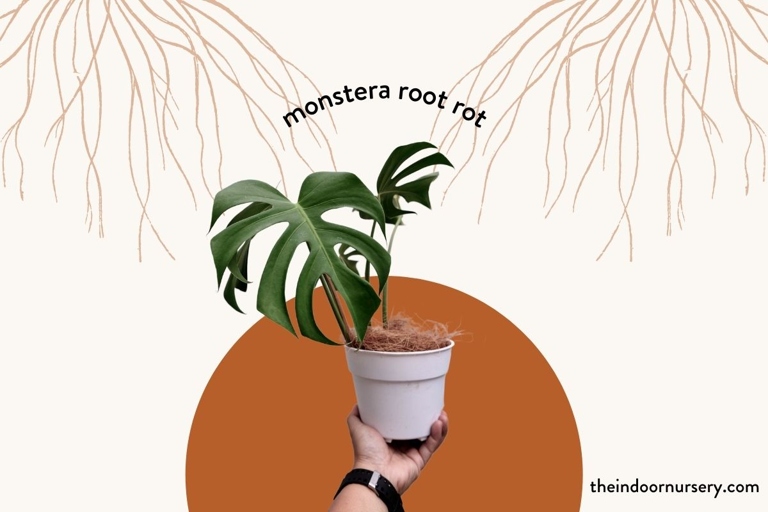
Root rot is a fungal disease that attacks the roots of the plant, causing them to rot. Hydrangeas are one of the most popular flowering shrubs, but they are susceptible to root rot. This can lead to the death of the plant.
There are several things you can do to save your hydrangea from root rot. Second, water your hydrangea regularly, but don’t overdo it. If the soil is too wet, the roots will rot. This will help it to stay strong and healthy. First, make sure you plant it in well-draining soil. Third, fertilize your plant regularly. Too much water can also lead to root rot.
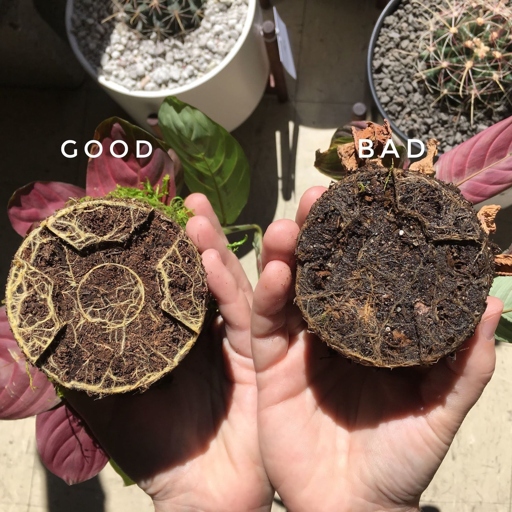
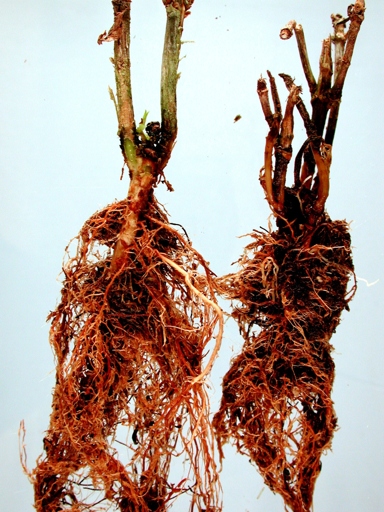
If they are black and mushy, they are probably rotted. If you think your hydrangea has root rot, there are some things you can do to save it. This will help it to stay strong and healthy. Third, fertilize your plant regularly. Second, water the plant regularly, but don’t overdo it. Too much water can lead to root rot. First, remove the plant from the pot and inspect the roots. Cut off any rotted roots and replant the plant in fresh, well-draining soil.
With a little care, you can save your hydrangea from root rot.
Repotting
One of the most important things to keep in mind is that they need to be repotted every few years. This is because their roots tend to get crowded and they need fresh soil to stay healthy. Hydrangeas are a beautiful addition to any home, but they can be a bit finicky when it comes to their care.
Signs that your hydrangea needs to be repotted include:
-The leaves are yellowing or falling off
-The plant is wilting, even when watered
-The roots are coming out of the drainage holes
-The plant is not growing as vigorously as it used to
If you see any of these signs, it’s time to repot your hydrangea. Then, place it in a new pot that is slightly larger and filled with fresh potting mix. Water well and give it a few days to adjust to its new home. The process is fairly simple and only takes a few minutes. First, remove the plant from its current pot and loosen the roots.
With a little bit of TLC, your hydrangea will thrive for years to come.
Using Appropriate Soil Mix
If the soil is too dense or too alkaline, it can lead to root rot. This problem is often caused by using the wrong soil mix. Hydrangeas are a popular flowering shrub, but they can be susceptible to root rot. Hydrangeas need a well-drained, slightly acidic soil.
To avoid this problem, make sure to use an appropriate soil mix for your hydrangeas. You can find soil mixes specifically designed for hydrangeas at most garden centers. If you’re not sure which mix to use, ask a garden expert for help.
With the right soil mix, you can help prevent root rot and keep your hydrangeas healthy and beautiful.
Watering After Repotting
When you water your hydrangea after repotting, be sure to water it slowly and deeply. Water the plant until the water runs out of the bottom of the pot. Do not let the plant sit in water.
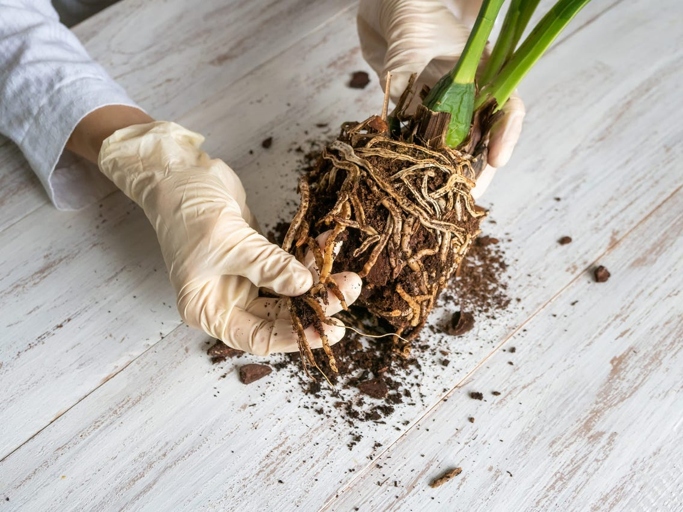
The first step is to remove the plant from the pot and inspect the roots. If you see any roots that are black or mushy, you will need to trim them away. If you see any signs of root rot, such as wilting leaves or stems, yellowing leaves, or mushy roots, you will need to take action immediately.
Once you have trimmed away any affected roots, you will need to repot the plant in fresh, sterile potting mix. Be sure to water the plant well and keep an eye on it for any further signs of root rot.
Care After Repotting
After repotting your hydrangea, it is important to water it regularly and keep an eye out for signs of root rot. Root rot is a common problem in hydrangeas and can be caused by overwatering, poor drainage, or compacted soil.
If they are black and mushy, you will need to trim them back to healthy tissue. If you think your hydrangea has root rot, the first step is to check the roots. The next step is to remove the plant from its pot and inspect the roots. If they are mushy or black, it is likely that the plant has root rot.
If the plant does not recover, it may need to be replaced. Once you have trimmed the roots, you can replant the hydrangea in fresh potting mix. Be sure to water it regularly and keep an eye out for signs of root rot.
Chemical Treatment
If you see any of the signs listed above, you should take action immediately. The first step is to identify the problem. Hydrangea root rot is a serious problem that can kill your plant. If you see any of the signs of hydration, you should check the roots of your plant. If they are discolored or mushy, you have a problem.
The next step is to treat the problem. There are many products on the market that will work. Be sure to follow the directions on the label carefully. Chemical treatment is the most effective way to kill the fungus that is causing the root rot.
If you take these steps, you should be able to save your plant. Root rot is a serious problem, but it is treatable.
Homemade Treatment for Hydrangea Root Rot
However, they are susceptible to root rot, which can kill the plant. There are several store-bought treatments for root rot, but you can also make your own at home. Hydrangeas are a beautiful addition to any garden.
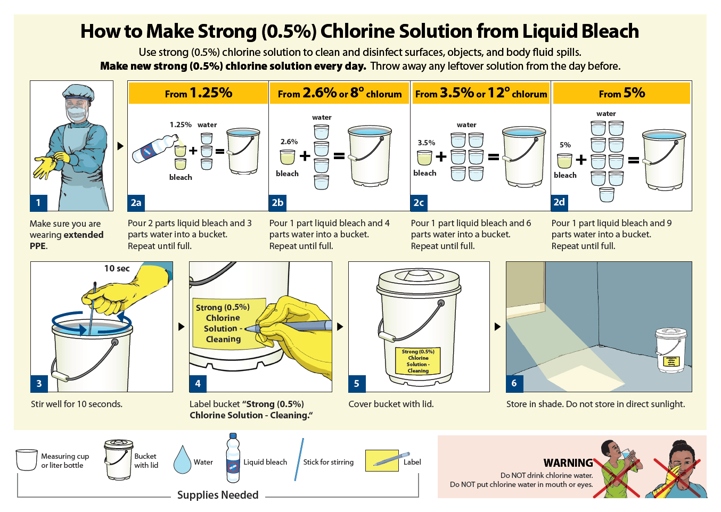
Apply this mixture to the affected areas of the plant. Let it sit for a few hours, then rinse it off with clean water. To make a homemade treatment for hydrant root rot, mix one part bleach with ten parts water.
Repeat this process every few days until the root rot is gone. Be sure to keep an eye on the plant and water it regularly, as root rot can cause the plant to wilt and die. With a little care, your hydrant will soon be healthy and beautiful again.
1. Sterilize the Cuttings
You can do this by dipping them in a solution of bleach and water (1 part bleach to 9 parts water). Sterilize the Cuttings: To prevent the spread of disease, it is important to sterilize your cutting tools before and after use. 1.
This will help to promote root growth. Dip the Cuttings: Dip the cuttings in the rooting hormone powder or gel, making sure to coat the entire cutting. 2.
Be sure to water them well and keep the soil moist. 3. Place the pot in a bright, indirect light. Plant the Cuttings: Plant the cuttings in a well-draining potting mix.
2. Seed Treatment Before Sowing
To prevent this, it is important to water the plants deeply but infrequently, and to make sure the soil drains well. Hydrangea plants are susceptible to root rot, a condition caused by a build-up of water in the soil.
Before planting, it is also helpful to treat the seeds with a fungicide to prevent root rot. This will help to protect the plants as they establish themselves in the soil. To do this, simply soak the seeds in a solution of fungicide and water for 24 hours before planting.
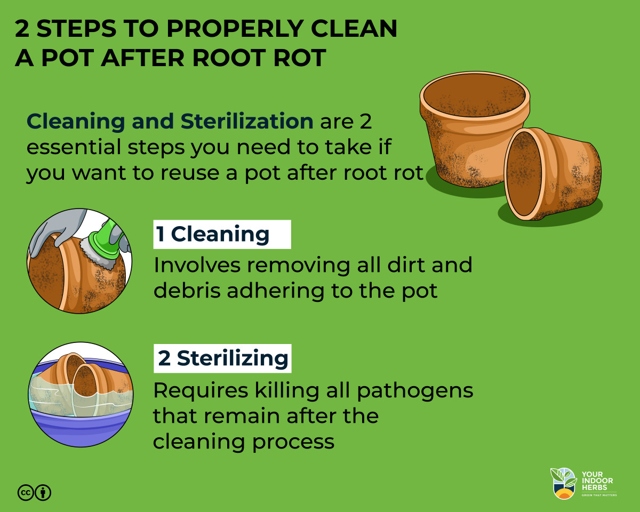
3. Disinfect Pots
One of the first steps is to disinfect your pots. Hydrangea root rot is a serious problem that can quickly kill your plants. This will help to prevent the spread of the disease and protect other plants in your collection. If you suspect your plant has root rot, it’s important to take action immediately.
To disinfect your pots, mix one part bleach with ten parts water. Rinse the pots well with clean water before using them again. Soak your pots in the solution for at least 30 minutes.

If you have root rot, it’s important to take action immediately. Disinfecting your pots is a simple and effective way to help prevent the spread of the disease.
4. Sterilize Soil
Sterilizing soil is easy to do and only requires a few simple steps. Sterilizing soil is a great way to prevent hydrant root rot. This soil-borne disease can quickly kill your plants, so it’s important to take measures to prevent it.
First, remove all of the plants and debris from the affected area. Next, till the soil to a depth of about 6 inches. Then, spread a layer of sterile soil over the area and rake it smooth. Finally, water the area thoroughly.

By taking a few simple steps, you can ensure that your plants will thrive. Sterilizing soil is a great way to prevent hydrant root rot and keep your plants healthy.
5. Disinfect Tools
If you notice your hydrangea’s leaves turning yellow or brown, or if the plant seems wilted or stunted, it may be a sign of root rot. Root rot is a serious condition that can kill your plant.
Water the plant regularly, but don’t overdo it. And disinfect your gardening tools before using them on your hydrangea, to avoid spreading any disease. To prevent root rot, make sure to plant your hydrangea in well-drained soil.
If the plant is still alive, you can try replanting it in fresh, well-drained soil. Remove the affected plant from the soil and prune away any dead or dying leaves or stems. If you think your plant has root rot, it’s important to act quickly. But if the root rot is severe, it’s best to dispose of the plant to prevent the disease from spreading.
6. Wash Hands Before Handling Plants
Hydrangea root rot is a serious problem that can kill your plants. Wash your hands before handling plants to prevent the spread of disease. If you think your plant has root rot, take it to a professional for diagnosis and treatment.
7. Maintain Humidity and Temperature
However, they are susceptible to root rot, which can be caused by too much or too little water, or by extreme temperatures. Hydrangeas are a popular plant for both indoor and outdoor gardens.
If the air is too wet, the leaves will turn yellow and the stems will become mushy. To prevent root rot, it is important to maintain the proper humidity and temperature for your hydrangeas. The ideal temperature for hydrangeas is between 60 and 70 degrees Fahrenheit. If the air is too dry, the leaves will begin to wilt and the flowers will drop.
By taking care to maintain the proper humidity and temperature, you can help prevent root rot and keep your hydrangeas healthy and beautiful.
8. Avoid Waterlogging
Hydrangeas are susceptible to root rot, which can be caused by overwatering or waterlogging. To avoid root rot, make sure to plant hydrate in well-drained soil and water only when the soil is dry. If they are brown and mushy, then the plant has root rot and needs to be disposed of. Remove the plant from the pot and inspect the roots. Overwatering can also cause root rot, so it’s important to water only when the soil is dry. If you think your plant has root rot, it’s important to act quickly. Waterlogging is when the soil is saturated with water and there is no drainage. This can happen if the soil is too dense, the pot doesn’t have drainage holes, or if the plant is sitting in water.
9. Develop Watering Schedule
Symptoms of root rot include yellowing leaves, wilting, and premature leaf drop. Root rot is a fungal disease that can be caused by overwatering or by planting in poorly drained soil. If you suspect your plant has root rot, it is important to take action immediately. Hydrangeas are a beautiful and popular flowering shrub, but they are susceptible to root rot.
The first step is to develop a watering schedule. Avoid watering in the evening, as this can promote fungal growth. Be sure to check the soil before watering to avoid overwatering. Water your plant deeply, but only when the soil is dry. If you live in an area with high humidity, you may need to water more frequently.
Amend the soil with sand or perlite to improve drainage. You may also need to replant your plant in a raised bed or container. Be sure to disinfect your tools and containers before replanting to avoid spreading the disease. If your plant has root rot, you may also need to improve drainage.
Root rot can be a serious problem, but it can be controlled with proper care. By following these steps, you can help your plant recover and prevent the disease from spreading.
10. Loosen Soil
Hydrangea root rot is a serious problem that can kill your plant. This will allow the roots to breathe and the plant to get the water it needs. The first step to solving this problem is to loosen the soil around the plant. If the soil is too compacted, the roots will not be able to get the oxygen they need and the plant will die.
11. Avoid Overfertilization
This can cause the roots to rot, and the plant to eventually die. This is because too much fertilizer can lead to an excess of water in the soil, which can then lead to the roots of the plant being unable to get the oxygen they need. Overfertilization is one of the leading causes of hydration root rot.
12. Ensure Care Requirements
Hydrangea root rot is a serious problem that can kill your plant. There are several things you can do to prevent or treat it.
If the soil is too wet, the roots will rot. First, make sure you plant your hydrangea in well-draining soil.
Watering deeply encourages deep root growth, which is less susceptible to rot. Second, water your plant deeply but not too often.
Third, if you see signs of root rot, such as yellowing leaves or wilting, immediately remove the affected roots and replant in fresh soil.
By following these simple steps, you can prevent or treat hydration root rot and keep your plant healthy.
How Do You Revive a Dying Hydrangea?
If you’re noticing that your hydrangea’s leaves are wilting, turning yellow or brown, and falling off, it’s likely that your plant has root rot. The good news is that it is possible to revive a dying hydrangea with the right care. Root rot is a serious problem that can kill your plant if left untreated.
To revive a dying hydrangea, start by removing any affected roots. With the right care, your hydrangea should start to recover and bloom again. Be sure to water the plant deeply, but avoid overwatering, which can exacerbate the root rot problem. Next, replant the hydrangea in fresh, well-draining soil. Finally, provide the plant with plenty of sunlight and nutrients.
Can You Reuse Soil That Has Root Rot?
Root rot is a serious problem for gardeners, as it can kill plants and make the soil unusable. However, there are some things you can do to salvage your soil and prevent root rot from happening in the first place.
If you have plants that are already suffering from root rot, you’ll need to remove them from the soil. This can be done by gently digging them up and replanting them in fresh soil. You’ll also need to remove any dead roots from the soil, as these can continue to spread the disease.
Once you’ve removed all the affected plants, you’ll need to treat the soil. Solarizing is a process where the soil is covered with plastic and left in the sun for several weeks, which kills the fungi that cause root rot. This can be done by adding fungicide to the soil or by solarizing it.
However, you’ll need to take care to prevent root rot from happening in the first place. After you’ve treated the soil, you can start planting again. This means watering your plants properly and not over-watering them. It’s also important to make sure the soil isn’t too compacted, as this can lead to poor drainage and an environment that’s ideal for root rot.
How Do You Revive Wilted Hydrangeas?
You’ll also need to remove any dead or dying roots from the plant. Root rot is caused by a fungus that attacks the roots of the plant, causing them to rot. The best way to revive a wilted hydrangea is to replant it in fresh, well-draining soil. Once the plant is replanted, water it deeply and keep the soil moist. If your hydrangea’s leaves are wilting and the stems are drooping, it’s likely that the plant is suffering from root rot. With proper care, your hydrangea should recover and bloom again next season.
Frequently Asked Questions
1. What are the signs of hydrangea root rot?
2. How can I tell if my plant has root rot?
3. What should I do if I think my plant has root rot?
4. How can I prevent root rot in my hydrangeas?
5. What causes root rot in hydrangeas?
1. The signs of hydrangea root rot are wilting leaves, yellowing leaves, and stunted growth. The plant may also have brown or black roots.
2. If you think your plant has root rot, you can check the roots for brown or black discoloration. You can also try gently tugging on the plant. If the plant comes out of the ground easily, it may have root rot.
3. If you think your plant has root rot, you should remove it from the ground and check the roots. If the roots are brown or black, you can trim them away and replant the plant in fresh soil.
4. You can prevent root rot in your hydrangeas by planting them in well-drained soil and watering them regularly. You can also add mulch to the soil to help retain moisture.
5. Root rot is caused by too much moisture in the soil. This can be due to overwatering, poor drainage, or heavy rains.
Final thoughts
Hydrangea root rot is a serious problem that can kill your plant. The first step to solving this problem is to identify the signs of hydration. These include wilting leaves, yellowing leaves, and stunted growth. If you see any of these signs, you should immediately take steps to improve the drainage around your plant. This may involve adding more organic matter to the soil or installing a drainage system. If the problem is severe, you may need to replant your hydration in a new location.