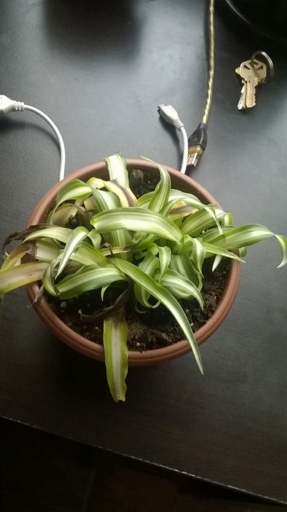
If you have a spider plant that’s been looking a little off lately, it may be suffering from root rot. Root rot is a common problem for spider plants, and can be caused by a number of factors, including overwatering, poor drainage, and compacted soil. Luckily, it’s relatively easy to treat, and your plant can often recover if you catch it early enough. Keep an eye out for these signs of root rot, and take action to save your spider plant!
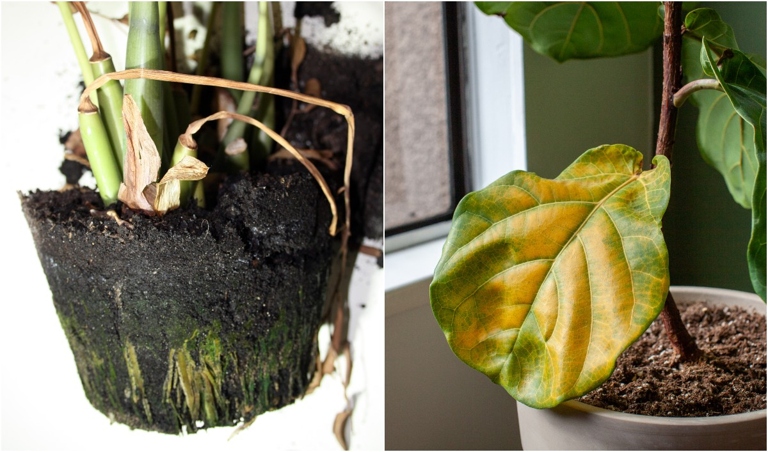
Signs of Root Rot in Spider Plant
Root rot is often caused by overwatering, so it is important to water spider plants only when the soil is dry. The roots of the plant become black and mushy, and the plant may wilt and die. If the roots are black and mushy, you will need to cut them off and replant the plant in fresh soil. Spider plants are susceptible to root rot, which is a fungal disease that attacks the plant’s roots. If you think your spider plant has root rot, you should remove it from the pot and inspect the roots.
Causes of Spider Plant Root Rot
Other causes of spider plant root rot include Pythium species and Rhizoctonia solani. Spider plants are susceptible to root rot, which can be caused by several different fungi. The most common cause of spider plant root rot is Phytophthora cinnamomi, which is a soil-borne pathogen that attacks the roots of the plant.

Spider plants are also susceptible to root rot if they are overwatered or if they are grown in waterlogged soil. Spider plants are typically grown in pots or containers, and they need well-draining soil to prevent the roots from sitting in water. If the soil is too wet or the pot does not have adequate drainage, the roots of the plant will start to rot.
To prevent spider plant root rot, it is important to plant the spider plant in well-draining soil and to water it only when the soil is dry. If you suspect that your spider plant has root rot, you can try to save the plant by removing it from the pot and replanting it in fresh, well-draining soil.
1. Overwatering
This leads to the roots rotting and the plant dying. Overwatering is one of the leading causes of spider plant root rot. When spider plants are overwatered, the roots are unable to get the oxygen they need to survive.

To prevent overwatering, make sure to only water your spider plant when the soil is dry to the touch. If you see any signs of root rot, such as yellowing leaves or wilting, immediately stop watering and allow the plant to dry out. If the root rot is severe, you may need to repot the plant in fresh, dry soil.
2. Poor Drainage
One of the most common problems with spider plants is poor drainage. There are a few things you can do to improve drainage, such as: This can lead to root rot, which can kill the plant.
-Adding organic matter to the soil, such as compost or peat moss.
-Making sure the pot has drainage holes.
-Using a pot with a wider bottom than top.
-Planting the spider plant in a raised bed.
If you suspect your spider plant has root rot, you should take it out of the pot and inspect the roots. If they are black and mushy, you will need to cut them off and replant the plant in fresh, well-draining soil.
3. Pathogenic Infections
Pathogenic infections can often be difficult to control, and can often lead to the death of the plant. Pathogenic infections are one of the leading causes of root rot in spider plants. The best way to prevent pathogenic infections is to avoid planting spider plants in areas that are known to be contaminated with pathogens. If you suspect that your spider plant has a pathogenic infection, you should contact a professional for help. These infections can be caused by a variety of different pathogens, including bacteria, fungi, and nematodes.
4. Inappropriate Environment (soil)
Spider plants are typically very hearty and easy to care for houseplants. However, they can fall victim to root rot if they are grown in an inappropriate environment.
If the soil is too dense or compacted, it will not drain properly and the roots will become waterlogged. This can lead to fungal growth and eventually root rot. The most important factor in preventing root rot is to make sure the plant is grown in well-draining soil.

Once the plant is in well-draining soil, be sure to water it only when the top inch of soil is dry. If it is waterlogged or feels dense and compacted, it needs to be replaced with fresh, well-draining soil. If you suspect your spider plant has root rot, the first step is to check the soil. Allowing the soil to dry out completely between waterings will help prevent root rot from returning.
5. Larger or Smaller Pots
If you have a spider plant that is in a pot that is too large, the roots will be too dry and will not be able to absorb enough water. This is because the roots will be crowded and will not have enough room to breathe. The best way to prevent root rot is to make sure that your spider plant is in a pot that is the right size. If you have a spider plant that is in a pot that is too small, it is more likely to experience root rot. When it comes to spider plants and root rot, the size of the pot can make a big difference.
6. Extreme Temperatures
That’s because spider plants are susceptible to root rot, which can occur when the plant is overwatered or exposed to extreme temperatures. When it comes to spider plants, too much of a good thing can actually be bad.
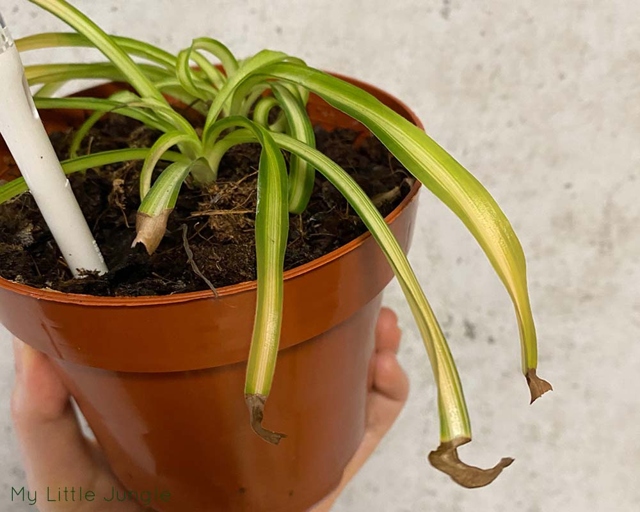
The first sign of root rot is usually yellowing leaves. Root rot is a serious condition that can kill a spider plant. If the problem is not addressed, the leaves will eventually turn brown and die. The roots of the plant will also start to rot, which can kill the plant.

If the plant is exposed to extreme temperatures, it’s important to move it to a cooler location. If root rot does occur, it’s important to remove the affected roots and replant the spider plant in fresh, dry soil. To prevent root rot, it’s important to water spider plants only when the soil is dry.
7. Watering During Dormant Periods
Without water, spider plants will go into a state of dormancy, which can lead to root rot. Watering during dormant periods is crucial for spider plants. Spider plants need to be watered every two to three weeks during the dormant period. If the plant is in the ground, check the soil every other week. If the plant is in a pot, make sure to check the soil every week to see if it is dry.
Other Spider Plant Root Causes
Another is planting the spider plant in soil that is too dense or heavy, which can prevent proper drainage and lead to rot. Finally, spider plants are susceptible to root rot if they are grown in an environment that is too humid or wet. One is over-watering, which can lead to waterlogged soil and encourage the growth of fungal pathogens. There are several other potential causes of spider plant root rot.
How to Treat Spider Plant Root Rot
Spider Plant Root Rot (Signs, Causes And Treatment)
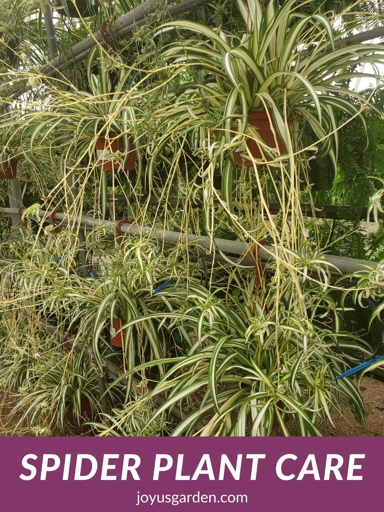
However, even the tough spider plant can succumb to problems, one of the most common being root rot. Spider plants are one of the most popular houseplants, and for good reason! They are easy to care for, tolerate a wide range of growing conditions, and are very resilient.
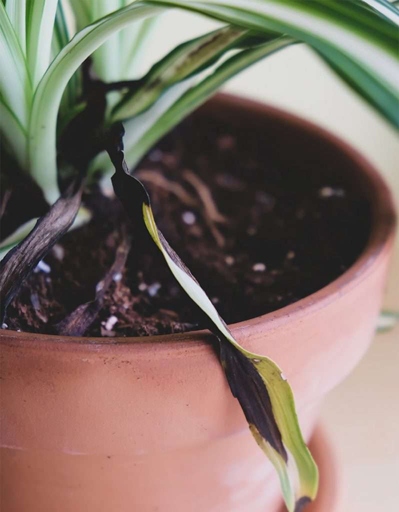
Root rot is a serious condition that can kill your spider plant if left untreated. The first sign of root rot is usually yellowing or wilting leaves. If they are mushy or black, your plant has root rot. If you notice these symptoms, check the roots of your plant.
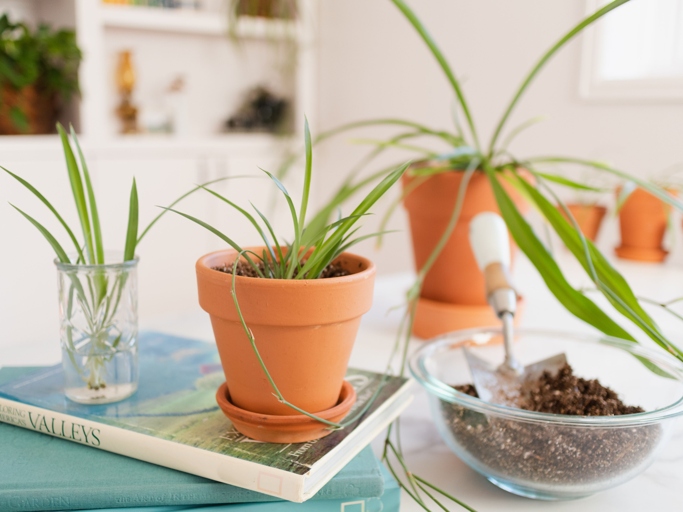
First, remove the affected plant from its pot and gently rinse the roots with clean water. Finally, replant the spider plant in fresh potting mix and water well. There are several things you can do to treat root rot. Next, trim away any mushy or black roots.
With proper care, your spider plant should recover from root rot and continue to thrive.
1. Repotting
With proper care, your spider plant should soon be back to its healthy self! If you think your spider plant has root rot, it’s important to take action immediately. Be sure to remove any affected roots, and water the plant sparingly until it recovers. The first step is to repot the plant in fresh, well-draining soil. If you notice your spider plant’s leaves turning yellow and wilting, it’s likely a sign of root rot. Root rot is a common problem in spider plants, and is caused by overwatering or poor drainage.
2. Using Appropriate Soil Mix
When it comes to spider plants, the type of soil you use can make all the difference. If you want your spider plant to thrive, it’s important to use an appropriate soil mix.

Spider plants are susceptible to root rot, so it’s important to choose a soil mix that won’t hold onto too much moisture. There are a few things to keep in mind when choosing a soil mix for your spider plant. First, the soil should be well-draining.
Spider plants need plenty of airflow to their roots in order to stay healthy. Second, the soil should be light and airy. A light, airy soil mix will help ensure that your spider plant gets the airflow it needs.
Finally, it’s important to choose a soil mix that contains some organic matter. This will help provide nutrients for your spider plant as it grows.
With the right soil, your spider plant will be sure to thrive. If you keep these things in mind, you’ll be sure to choose an appropriate soil mix for your spider plant.
3. Watering After Repotting
This will help the plant to recover from the stress of being transplanted and will also help to prevent root rot. When you repot a spider plant, it is important to water it thoroughly.
After you have transplanted your spider plant, water it generously. Allow the water to seep down into the soil and saturate the roots. Be sure to empty any excess water from the saucer so that the roots are not sitting in water.
By giving the plant a good drink, you will help it to recover from the stress of being transplanted and also help to prevent root rot. Watering after repotting is essential for spider plants.
4. Care After Repotting
Once you’ve repotted your spider plant, it’s important to take care of it properly to ensure that it doesn’t experience root rot. Here are a few tips to follow:
Allow the soil to dry out in between waterings. – Water your plant regularly, but be sure not to over-water it.
– Place your plant in a bright, indirect light.
– Keep an eye on the roots and make sure they’re not getting too wet or too dry.
By following these simple tips, you can help your spider plant thrive and prevent root rot.
5. Avoid Waterlogging
When the soil is waterlogged, it doesn’t allow the roots to breathe and can cause them to rot. Waterlogging is one of the leading causes of spider plant root rot. Let the soil dry out in between waterings, and if you notice that the plant is wilting, it’s a sign that it’s not getting enough water. To avoid waterlogging, make sure that the pot has drainage holes and that you’re not overwatering the plant.
6. Watering Schedule
Spider plants are one of the most popular houseplants because they are easy to care for. However, spider plants can suffer from root rot if they are overwatered.
Root rot is a serious problem that can kill your spider plant. The first sign of root rot is usually yellowing leaves. If you see this, it’s important to check the roots of your plant. If they are mushy or black, this is a sure sign of root rot.

The best way to prevent root rot is to water your spider plant only when the soil is dry. Allow the top few inches of soil to dry out before watering again. If you think your plant has root rot, you can try to save it by replanting it in fresh, dry soil.
7. Avoid Excess Fertilizer Application
Spider plants need a light feeding of a balanced fertilizer every few weeks during the growing season. Spider plants are susceptible to root rot, so it’s important to avoid over-fertilizing them. Excess fertilizer can build up in the soil and lead to problems like root rot. Be sure to follow the directions on the fertilizer package, and don’t apply more than the recommended amount.
8. Check Humidity Levels
One of the most common problems with spider plants is root rot. Another cause of root rot is overwatering. If you water the plant too often, the roots can’t get the oxygen they need and they start to die. If the pot doesn’t have drainage holes, the water can’t drain out and the roots start to rot. This can be caused by several different things, but the most common is too much moisture in the pot.
If the pot is too wet, the roots can’t breathe and they start to rot. To prevent root rot, it’s important to check the humidity levels in your pot. The best way to check the humidity is to stick your finger in the potting mix. If it’s too wet, the mix will stick to your finger. If it’s too dry, the mix will fall off your finger.
If you think your spider plant has root rot, the best thing to do is to take it out of the pot and inspect the roots. If they’re black and mushy, they’re probably dead. If they’re white and firm, they’re still alive. To save the plant, you need to cut off the dead roots and repot the plant in fresh potting mix.
9. Bacteria, Fungus, Pests and Diseases
Bacteria, Fungus, Pests and Diseases
Root rot is caused by a build-up of bacteria and/or fungus in the soil, which can kill the plant. Spider plants are susceptible to a number of pests and diseases, including root rot.
If you think your plant has root rot, it’s important to act quickly. There are a few signs that your spider plant has root rot, including yellowing or wilting leaves, brown or black roots, and a foul smell.

The best way to treat root rot is to remove the affected plant from the pot and dispose of the soil. Then, replant the spider plant in fresh, sterile potting mix. Be sure to water the plant carefully, as too much water can exacerbate the problem.
10. Pruning
Pruning is an important part of spider plant care. It helps to keep the plant healthy and can prevent problems like root rot. Cut back any long or leggy stems to encourage new growth. When pruning, be sure to remove any dead or dying leaves or stems.
11. Propagation
Spider plants are very easy to propagate. After a few weeks, roots will begin to form and the cutting can then be transplanted into soil. All you need to do is take a cutting from the mother plant and place it in water.
They will be discolored and mushy if root rot is present. If you suspect your spider plant has root rot, the first thing to do is check the roots. This is a common problem when the plant is overwatered or the soil is too dense. Spider plants are very susceptible to root rot, however.
Be sure to water the plant sparingly until it establishes itself in the new soil. Treatment for root rot is to remove the affected roots and replant the cutting in fresh, sterile soil.
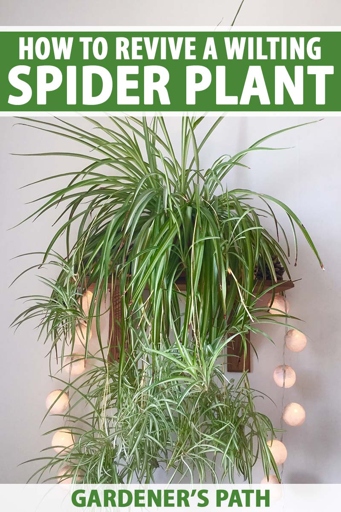
Practical Hacks that Will Revive Your Dying Spider Plant
Here are some practical hacks that will revive your dying spider plant. If your spider plant is wilting, its leaves are turning yellow, and it just doesn’t look as healthy as it used to, it may be suffering from root rot.
Cut away the rotted roots and replant the spider plant in fresh, well-draining potting mix. First, check the roots. If they are mushy or black, they are probably rotted.
Water the soil, not the leaves, and don’t let the plant sit in water. Next, water your spider plant carefully. Water it in the morning so the leaves have time to dry before nightfall.

Finally, give your spider plant some extra TLC. With a little love and care, your spider plant will be back to its old self in no time. Move it to a bright spot out of direct sunlight, and fertilize it monthly with a half-strength fertilizer.
How to Prevent and Control Spider Plant Root Rot
There are a few things you can do to prevent and control it. Spider plant root rot is a common problem that can be difficult to control.
If the roots are constantly wet, they will start to rot. First, make sure your spider plant is getting enough drainage. If you’re growing your spider plant in a pot, make sure it has drainage holes in the bottom.
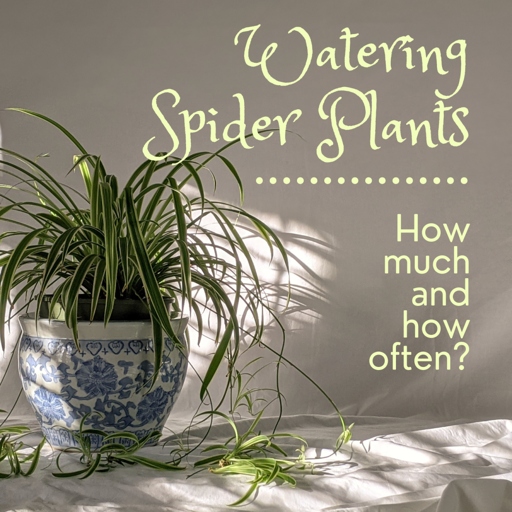
Second, don’t over-water your plant. Water it when the soil is dry to the touch.
Remove the affected roots and replant in fresh, dry soil. Third, if you see any signs of root rot, such as yellowing leaves or stunted growth, act quickly.
By following these tips, you can prevent and control spider plant root rot.
Controlling Spider Plant Root Rot
You can also try gently tugging on the plant to see if the roots are firm. If you think your spider plant has root rot, inspect the roots for signs of decay, such as discoloration or mushiness. Spider plants are susceptible to root rot, which can be caused by overwatering, poor drainage, or compacted soil. If the roots are rotted, you’ll need to remove them and replant the spider plant in fresh, well-drained soil. Spider plants need well-drained soil and should be watered only when the soil is dry to the touch.
Why is my Spider Plant dying?
Spider plants need well-drained soil, so if your plant is sitting in water, it’s likely to develop root rot. If your spider plant is dying, it’s likely due to root rot. Root rot is a common problem with spider plants, and it’s usually caused by too much water. If the roots are black and mushy, they’re probably rotten. If you think your plant has root rot, you should remove it from the pot and check the roots. You can try to save the plant by trimming away the rotten roots and replanting it in fresh, well-drained soil.
Does Hydrogen Peroxide Kill Root Rot?
It’s also a popular home remedy for treating root rot in plants. Hydrogen peroxide is a common household chemical that can be used for a variety of purposes, including cleaning and disinfecting.
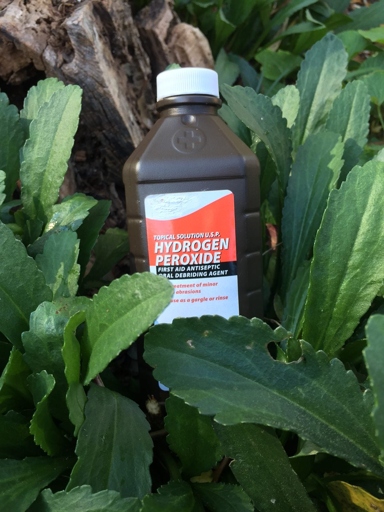
It’s caused by a variety of fungi, and it can be difficult to treat. Root rot is a serious problem that can kill your plants. Hydrogen peroxide can be effective in treating root rot, but it’s important to use it correctly.
If you’re using hydrogen peroxide to treat root rot, be sure to use a 3% solution. You should see results within a few days. Apply the hydrogen peroxide to the affected area, and then water your plant as usual.
If you don’t see any improvement, or if the root rot is severe, you may need to use a stronger solution of hydrogen peroxide. Be sure to follow the instructions carefully, and always use gloves and eye protection when working with hydrogen peroxide.
Can Plants Recover From Overwatering?
If you’ve ever overwatered your houseplant, you know that it can be a difficult mistake to recover from. Whether you were away on vacation or simply forgot to check the soil, overwatering is a common problem that can cause your plant to wilt, droop, and even die. While it may seem like there’s no coming back from such a mistake, there is some good news: with the right care, most plants can recover from overwatering.
Take a look at the soil; if it’s soggy or mushy, that’s another sign that you’ve been watering your plant too much. If your plant is wilting or its leaves are drooping, it’s likely that it’s suffering from overwatering. The first step is to assess the damage.
The most important thing is to stop watering your plant until the soil has had a chance to dry out completely. This may take a few days, so be patient. Once you’ve determined that your plant is overwatered, the next step is to take action to help it recover. Allow the top inch or so of soil to dry out before watering, and never leave your plant sitting in water. Once the soil is dry, you can start watering your plant again, but be sure to do so sparingly.
With some time and care, most plants can recover from overwatering. Just be patient, and be sure to water your plants only when they need it.
Frequently Asked Questions
1. What is spider plant root rot?
2. What are the signs of spider plant root rot?
3. What are the causes of spider plant root rot?
4. How can I treat spider plant root rot?
5. How can I prevent spider plant root rot?
1. Spider plant root rot is a condition that can affect the health of your plant.
2. The signs of spider plant root rot include yellowing leaves, wilting, and stunted growth.
3. The causes of spider plant root rot include overwatering, poor drainage, and compacted soil.
4. To treat spider plant root rot, you should improve drainage, reduce watering, and remove any affected roots.
5. To prevent spider plant root rot, you should water your plant properly, avoid overwatering, and ensure that the soil is well-drained.
Final thoughts
Spider plants are a common houseplant, but they’re susceptible to root rot. Root rot is a fungal disease that causes the roots of the plant to decay. Symptoms of root rot include yellowing leaves, wilting, and stunted growth. Root rot is caused by overwatering, so it’s important to water your spider plant only when the soil is dry. If you think your spider plant has root rot, you can try treating it with fungicide. If the plant is too far gone, you’ll need to replace it.