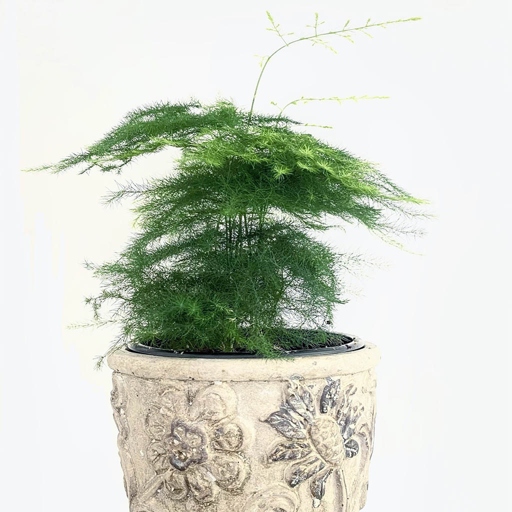
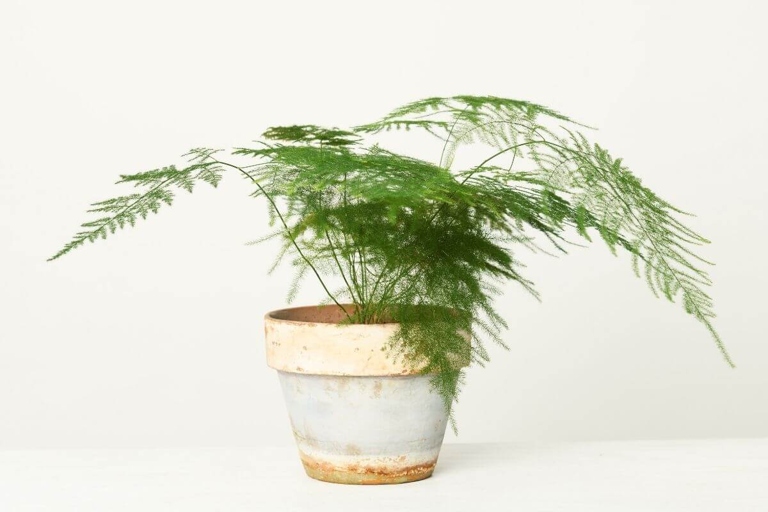
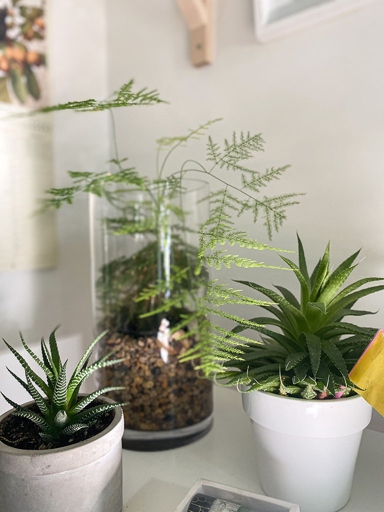
If you’re looking for a plant that will add a touch of elegance to your home, the plumosa fern is a great option. This type of fern is relatively easy to care for, and it can thrive in a wide range of environments. In this complete care guide, we’ll cover everything you need to know about plumosa ferns, from watering and fertilizing to pruning and propagating.
Plumosa Fern Care Details
Here are a few tips to keep your plumosa fern healthy and happy: They are easy to care for and require very little maintenance. Plumosa ferns are beautiful, airy plants that make a great addition to any home.
They will tolerate some direct sun, but too much direct sunlight can scorch their delicate leaves. Light: Plumosa ferns prefer bright, indirect light.
Allow the water to drain completely before putting the pot back in its saucer. Water: Water your plumosa fern when the top inch of soil is dry. Be sure to use room temperature water, as cold water can shock the plant.
During the winter months, you can reduce fertilizing to once a month. Fertilizer: Feed your plumosa fern every two weeks during the growing season with a balanced liquid fertilizer.
Pruning: Plumosa ferns do not require much pruning, but you can trim off any brown or yellow leaves as needed.
With just a little bit of care, your plumosa fern will thrive and bring a touch of elegance to your home.
Plumosa Fern Care
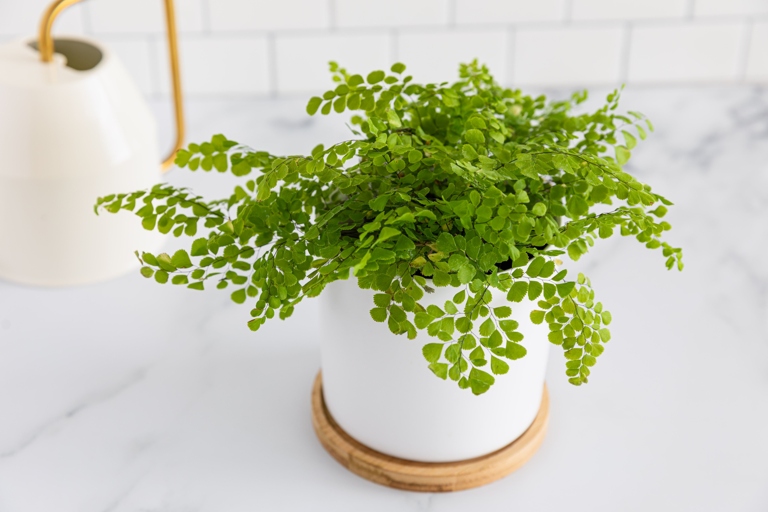
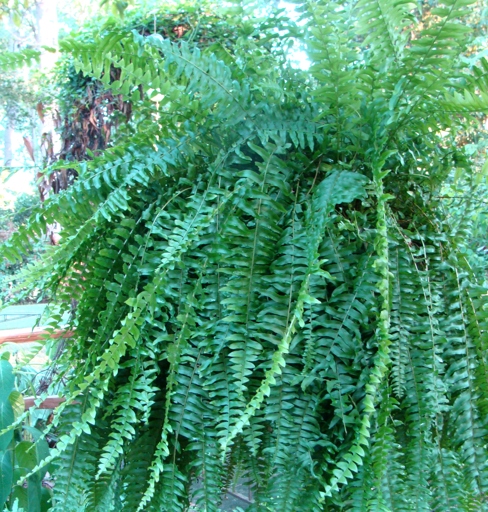
Plumosa ferns are one of the most popular houseplants because of their beautiful, feathery leaves. They are easy to care for and make a great addition to any home.

Keep the soil moist, but not wet. Place it in a bright spot, but out of direct sunlight. To keep your plumosa fern healthy, water it regularly and fertilize it monthly.
If you notice the leaves turning brown or yellow, it is likely due to too much sun or not enough water. Move the plant to a shadier spot and increase watering.
With proper care, your plumosa fern will thrive and bring beauty to your home for years to come.
Light Requirements for Plumosa
Plumosa ferns are one of the most popular houseplants because of their beautiful, feathery leaves. They are also very easy to care for, and can thrive in a wide range of conditions.

However, if they don’t get enough light, they will become leggy and their leaves will lose their color. If they are placed in too much direct sunlight, their leaves will scorch and turn brown. One of the most important things to remember when caring for a plumosa fern is that they need bright, indirect light.
If you don’t have a spot like this in your home, you can also use grow lights to provide the right light conditions for your plant. To ensure that your plumosa fern gets the right amount of light, place it near a window that gets plenty of bright, indirect sunlight throughout the day.
With the right amount of light, your plumosa fern will thrive and provide you with beautiful, feathery leaves that add a touch of elegance to any room.
How to Water Plumosa
Plumosa ferns are one of the most popular houseplants because of their beautiful, feathery leaves. They are easy to care for and make a great addition to any home.
Ferns like humid conditions, so misting the leaves with water is also beneficial. To water your plumosa fern, simply give it a good soaking once a week. Be sure to empty any water that collects in the saucer underneath the pot.
Fertilize your fern every month during the growing season with a half-strength solution of liquid fertilizer. Be sure to follow the directions on the fertilizer package.
With a little care, your plumosa fern will thrive for many years. Plumosa ferns are relatively low-maintenance plants, but there are a few things you need to do to keep them healthy and looking their best.
Humidity
If you live in an area with low humidity, you can increase the humidity around your fern by placing it on a pebble tray or by using a humidifier. The plumosa fern is a tropical plant that thrives in high humidity.
Ferns are sensitive to changes in humidity, so it’s important to keep an eye on the levels in your home. If the air is too humid, the fronds will start to rot. If the air is too dry, the fronds will start to turn brown and curl up.

By maintaining these levels, you’ll have a healthy, happy fern that will thrive for years to come. The ideal humidity level for a plumosa fern is between 40-60%.
Temperature
If the temperature gets too high, the leaves will start to turn brown and drop off. They can tolerate lower temperatures, but their growth will be stunted. The ideal temperature for a plumosa fern is between 65 and 75 degrees Fahrenheit.
To keep your plumosa fern healthy, make sure to keep an eye on the temperature. With the proper care, your plumosa fern will thrive and bring you years of enjoyment. If it starts to get too hot or too cold, take action to adjust the temperature accordingly.
Soil Requirements of Plumosa Fern
Plumosa ferns are one of the most popular houseplants because of their ability to thrive in a wide range of conditions. Though they are tolerant of neglect, they will produce the best results with proper care.
This can be achieved by adding compost or peat moss to your potting soil. To ensure your plumosa fern is getting the nutrients it needs, it is important to use a potting mix that is high in organic matter.
Be sure to follow the directions on the fertilizer package, as too much fertilizer can burn the leaves of your fern. Your fern will also appreciate being fertilized on a regular basis. A water-soluble fertilizer that is high in nitrogen can be applied every two weeks during the growing season.
Plumosa ferns prefer to grow in bright, indirect light. If the leaves of your fern start to turn yellow, it is an indication that it is not getting enough light. Move your plant to a brighter location.
Overwatering can lead to root rot, so be sure to drainage holes in the bottom of your pot. These ferns are not drought tolerant and will need to be watered on a regular basis. Allow the top inch of soil to dry out before watering again.
With proper care, your plumosa fern will thrive and provide you with beautiful foliage for many years to come.
Fertilizer
Apply the fertilizer according to the manufacturer’s instructions. The best time to fertilize is during the growing season, which is typically from spring to fall. You can use a water-soluble fertilizer or a slow-release fertilizer. Fertilizer is an important part of keeping your plumosa fern healthy and vibrant.

If you want to encourage growth and produce larger fronds, you can fertilize more frequently. However, be careful not to over-fertilize, as this can burn the roots and damage the plant.
Granular vs Liquid
Granular vs Liquid
Each method has its own set of pros and cons that you should consider before making a decision. When it comes to watering your plumosa fern, you have two options: granular or liquid.
It is simple and easy to do, and it provides a consistent supply of moisture to the roots. Granular watering is the most common method used by fern growers. However, it can be difficult to control the amount of water that the fern receives, and over-watering can lead to problems.
However, it can be more difficult to set up and maintain, and it requires more attention than granular watering. It is easier to control the amount of water that the fern receives, and it is less likely to cause problems with over-watering. Liquid watering is a less common method, but it has its advantages.
Synthetic vs Organic
Synthetic ferns are created in a laboratory setting and are typically made from plastic or other synthetic materials. When it comes to ferns, there are two main types: synthetic and organic. Organic ferns, on the other hand, are made from real plants that have been carefully cultivated.

So, which type of fern is right for you? If you’re looking for a low-maintenance plant that will last for years, a synthetic fern may be the way to go. However, if you’re looking for a more natural option that will add a touch of greenery to your home, an organic fern is the way to go.
Propagation of Plumosa Fern
Cut a 2-3 inch piece of stem from the plant, making sure to include at least 2 sets of leaves. In 4-6 weeks, your cutting should have rooted and begun to produce new growth. Remove the bottom leaves from the cutting, and dip the cut end into rooting hormone. All you need is a sharp knife and a healthy plant to take your cutting from. Plumosa ferns are one of the easiest ferns to propagate. Start by finding a spot on the plant where there is new growth. Plant the cutting in a pot filled with moistened potting mix, and keep the soil moist but not soggy.
Seed Propagation
It is a relatively simple process that can be done at home with some basic supplies. Seed propagation is a process of growing new plants from seeds.
Water the seeds well and place the tray in a warm, bright location. Sow the seeds on the surface of the mix and lightly press them into the mix. Keep the soil moist but not wet and the seeds should germinate in 14-21 days. To propagate plumosa ferns from seed, start by filling a seed tray with a well-draining potting mix.

Water them well and place them in a bright, warm location. Transplant the seedlings into individual pots filled with a well-draining potting mix. Keep the soil moist but not wet and the seedlings should continue to grow and thrive. Once the seedlings have emerged, thin them out so that only the strongest seedlings remain.
Vegetative Propagation
Vegetative propagation is a type of asexual reproduction that involves the vegetative parts of a plant, such as leaves, stems, and roots. This process can be used to propagate both annual and perennial plants. Annual plants are typically propagated by seed, while perennial plants are propagated by vegetative means.
This method is often used to propagate perennials. Division is a process by which a plant is divided into two or more parts, each of which can then be planted separately. This method is often used to propagate houseplants. Rooting stem cuttings is a process by which a cutting from a plant is taken and then rooted in soil. There are several methods of vegetative propagation, including rooting stem cuttings, division, and layering. Layering is a process by which a stem is bent and then buried in soil. This method is often used to propagate woody plants.

It is a great way to create new plants without having to start from seed. Vegetative propagation is an easy and efficient way to propagate many plants.
How to Repot Plumosa Fern
A mix of one part peat moss and one part perlite or sand is a good option. First, choose a pot that is only slightly larger than the current one. When it comes time to repot your plumosa fern, there are a few things to keep in mind. Second, use a well-draining potting mix. This will help to prevent the roots from becoming pot-bound. Finally, water the fern well before repotting to help reduce stress on the plant.
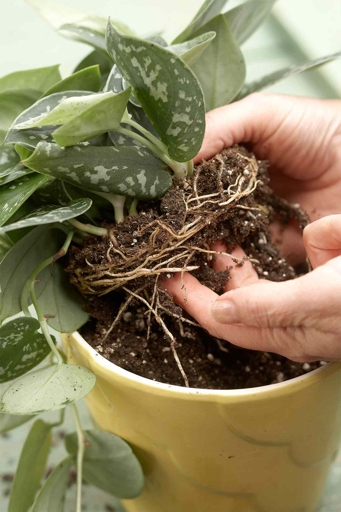
loosen the roots and tease them out a bit before placing the plant in the new pot. The fern should be placed in a location with bright, indirect light and high humidity. Fill in around the roots with the potting mix, and water well. To repot the fern, gently remove it from the current pot.
1. Repot when the plant develops severe root rot
Next, replant the fern in a new pot with fresh, well-draining soil. This can be a difficult process, but it’s necessary to save your plant. First, remove the plant from its pot and gently remove the roots. Be sure to water it regularly and keep an eye on it for any further signs of root rot. If they’re too rotted to save, discard them. When your plant develops severe root rot, it’s time to repot.
2. Repot When The Root Gets Bound
When the roots of a plumosa fern get bound, it’s time to repot the plant. Be sure to use a well-draining potting mix, and water the fern thoroughly after repotting. The fern will need to be repotted every few years to keep it healthy.
3. Repot When The Quality of The Soil Deteriorates
Water the fern thoroughly before repotting, and then remove it from its current pot. When the quality of the soil deteriorates, it’s time to repot your plumosa fern. Place the fern in a bright, indirect light. Be sure to use a well-draining potting mix and a pot with drainage holes. Fill in around the roots with potting mix, and water again. Gently loosen the roots and place the fern in the new pot.
4. Repot When The Soil Infected With Pathogens
If you notice that your plumosa fern’s soil is infected with pathogens, it’s important to repot the plant as soon as possible. Pathogens can cause serious harm to your plant, and can even kill it if left untreated.
To repot your plumosa fern, first remove the plant from its current pot. Carefully inspect the roots for any signs of disease or damage. If you see any, cut away the affected roots with a sharp knife.
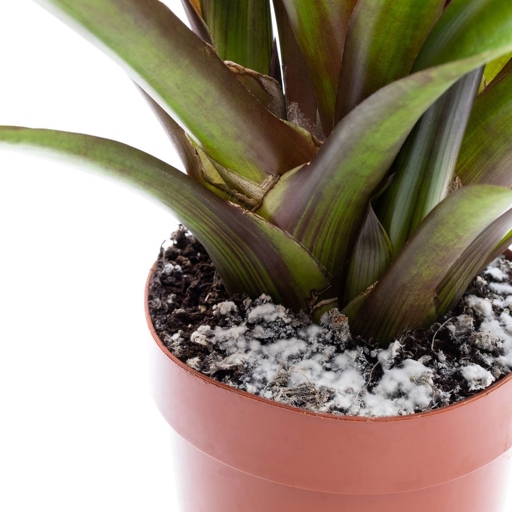
Fill the pot with fresh, sterile potting mix. Next, choose a new pot that is slightly larger than the old one. Gently place your plumosa fern in the pot, and water it well.
Be sure to keep an eye on your plant over the next few weeks. If you see any further signs of disease, contact a professional for help.
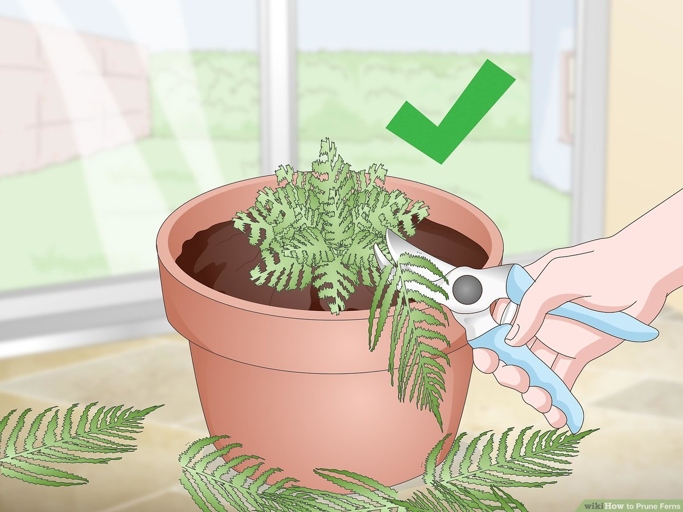
Pruning Plumosa
Cut back the fronds that are brown or yellowing, as well as any that are damaged or dead. You can also trim back any overgrown or leggy fronds. Pruning plumosa ferns is best done in the spring, before new growth begins. Pruning plumosa ferns is a simple process that can be done with a sharp pair of scissors or pruning shears.
Trim to Achieve a Desired Shape and Size
Plumosa ferns are a type of fern that can be found in many different parts of the world. They are known for their ability to thrive in a variety of climates and for their beautiful, lacy leaves.
It is also important to avoid trimming too much, as this can damage the plant. Plumosa ferns can be trimmed to achieve a desired shape and size. When trimming, it is important to remove any dead or dying leaves, as well as any leaves that are significantly smaller than the others.
If you are looking to achieve a specific shape or size for your plumosa fern, it is best to consult with a professional. They will be able to help you determine the best way to trim your plant without damaging it.
Trim to Remove Damaged or Aged Portions
Plumosa ferns can grow to be quite large, so it is important to trim them back on a regular basis to remove any damaged or aged portions. They are often used as houseplants or in gardens. Plumosa ferns are a type of evergreen fern that is native to tropical regions.
Once you have identified the areas that need to be trimmed, use a sharp pair of scissors to cut the leaves back. Be sure to make clean, sharp cuts so that the plant can heal quickly. To trim a plumosa fern, first, identify the areas that need to be trimmed. Damaged leaves should be removed, as well as any leaves that are starting to turn brown or yellow.
This will help the plant to heal and will also encourage new growth. After you have trimmed the plumosa fern, it is important to give it a good watering.
Prevent Plumosa Losing Water When It’s Hot
This is because the plant is trying to conserve water in the hot weather. There are a few things you can do to help prevent your plumosa fern from losing water in the heat. When the temperature outside starts to heat up, your plumosa fern may start to lose water.
First, make sure you are watering your fern regularly. If the soil is too dry, the plant will start to wilt. The soil should be moist, but not soggy.
Second, mist the leaves of the plant with water regularly. This will help keep the leaves from drying out and prevent the plant from losing water.
Third, place the plant in a spot that is out of direct sunlight. The sun can dry out the leaves of the plant and cause the plant to lose water.

By following these tips, you can help prevent your plumosa fern from losing water in the heat.
Pests
The most common pests are aphids, mealybugs, and spider mites. Pests are a common problem for plumosa ferns. These pests can cause damage to the leaves and stems of the fern.
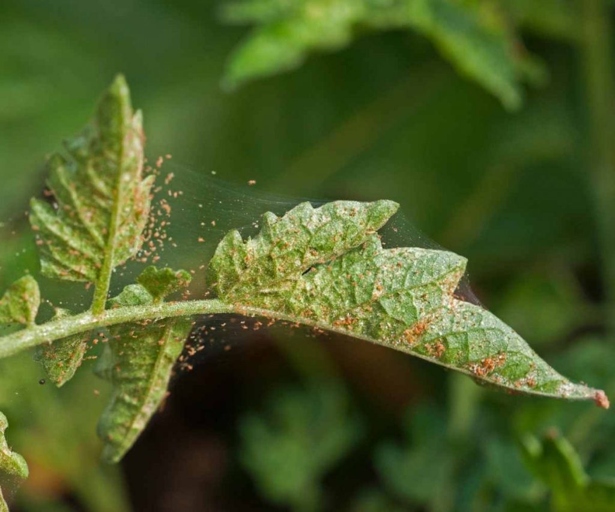
They can cause damage to the leaves and stems of the fern. Spider mites are small, spider-like insects that feed on the sap of plants. Aphids are small, soft-bodied insects that feed on the sap of plants. Mealybugs are small, white insects that feed on the sap of plants.
To control these pests, you can use insecticidal soap or neem oil. You can also remove them by hand.
Diseases
Here are some of the most common diseases that affect ferns, and how to treat them. Ferns are a beautiful addition to any home, but they’re also susceptible to a number of diseases.

Powdery mildew appears as white or grayish powdery spots on the leaves of affected plants. Powdery mildew is a common fungal disease that affects many types of plants, including ferns. Powdery mildew is most commonly seen in humid or wet conditions. It can cause the leaves to yellow and eventually drop off. To treat powdery mildew, you can use a fungicide.
It’s caused by a fungus that attacks the roots of the plant. Fusarium wilt is another common disease that affects ferns. This can cause the leaves to wilt and turn yellow. To treat Fusarium wilt, you can use a fungicide. Fusarium wilt is most commonly seen in warm, wet conditions.
Leaf spot is another fungal disease that can affect ferns. It appears as small, dark spots on the leaves of affected plants. Leaf spot can cause the leaves to yellow and eventually drop off. To treat leaf spot, you can use a fungicide.
Root Rot
Remove the fern from its pot and inspect the roots. If you suspect your fern has root rot, it’s important to act quickly. Root rot is a serious problem for plumosa ferns. If they are brown and mushy, root rot has set in.

One is to replant the fern in fresh, sterile potting mix. There are several ways to treat root rot. Another is to drench the roots in a solution of fungicide and water.
Root rot is a serious problem, but it can be treated if caught early. With proper care, your plumosa fern will thrive for years to come.
Crown Rot
Crown rot is a serious problem for plumosa ferns. The disease is caused by a fungus that attacks the roots of the plant, causing the leaves to turn brown and die. If you see signs of crown rot, remove the affected leaves and roots and dispose of them. If the soil is too dry, the roots will be more susceptible to the fungus. The best way to prevent crown rot is to water the ferns regularly and keep the soil moist.
Toxicity
Plumosa ferns are beautiful, air-purifying houseplants that are surprisingly easy to care for. However, they can be toxic to pets and children if ingested, so take care to keep them out of reach.
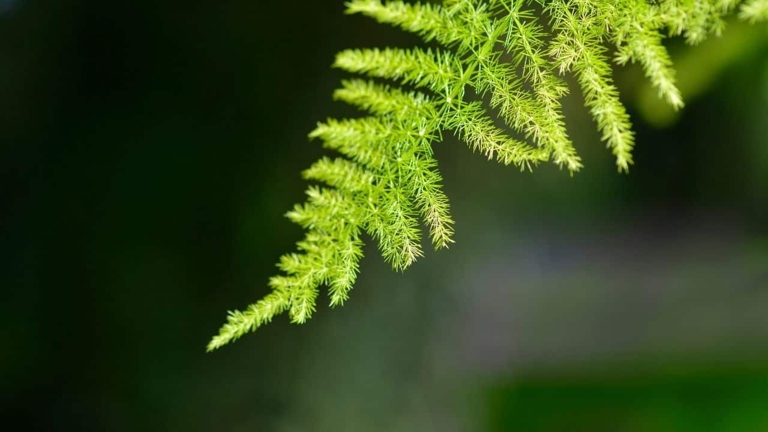
They have long, feathery leaves that can range in color from deep green to yellow-green. Plumosa ferns are native to tropical regions of South America, and they’re often used as ornamental plants.
Allow the soil to dry out slightly between waterings. These ferns are relatively low-maintenance, but they do need bright indirect light and regular watering.
If you suspect your pet or child has eaten a Plumosa fern, contact a veterinarian or medical professional immediately. While Plumosa ferns are generally safe for humans, they can be toxic to pets and children if ingested. The plant contains saponins, which can cause vomiting and diarrhea.
Plumosa Fern Care Tips
They are commonly used as houseplants or in outdoor gardens in these regions. Plumosa ferns are a type of evergreen fern that is native to tropical and subtropical regions. The leaves are usually green, but some varieties have yellow or white stripes. Plumosa ferns have long, feathery leaves that can grow up to 2 feet long.

Plumosa ferns can be fertilized monthly during the growing season. They should be watered regularly, but allowed to dry out somewhat between watering. Plumosa ferns need bright, indirect light and high humidity to thrive.
To keep your plumosa fern looking its best, trim off any brown or yellow leaves as they occur. You can also mist the leaves regularly to help increase the humidity around the plant.
Start With Healthy Plant
If you’re looking for a low-maintenance houseplant, the plumosa fern is a great option. Here’s what you need to know to keep your plumosa fern happy and healthy. These delicate-looking plants are actually quite tough and can thrive with minimal care.
These plants also like bright, indirect light, so a spot near a window is ideal. If your home is on the dry side, regular misting will help keep your fern healthy. Plumosa ferns are native to tropical regions, so they prefer warm, humid conditions.
Allow the water to drain away completely and don’t let the plant sit in water, as this can cause root rot. Water your plumosa fern when the soil is dry to the touch. fertilize your fern every few weeks during the growing season with a half-strength solution of liquid fertilizer.
With a little care, your plumosa fern will thrive and add a touch of greenery to your home.
Set a Conducive Environment
When it comes to houseplants, there are a few things you need to create a conducive environment for them to thrive. For the Plumosa Fern, also known as the Asparagus Fern, bright indirect light and high humidity are key.
The water will evaporate and increase the humidity around the plant. A pebble tray is simply a tray filled with pebbles and water. To create a humid environment for your fern, you can mist it daily or set it on a pebble tray.
If you don’t have a bright spot in your home, you can supplement with grow lights. As for light, an east or west-facing window is ideal.
Finally, the Plumosa Fern likes to be on the drier side, so allow the top couple inches of soil to dry out before watering.
Enough Should Be Enough
In the wild, plumosa ferns can grow up to 6 feet tall. These beautiful plants are native to tropical regions of South America, Africa, and Australasia. But when grown in pots, they are usually much smaller, reaching a height of only 2-3 feet.
The soil should be kept moist but not soggy. They prefer bright, indirect light but will tolerate some direct sun. Plumosa ferns are easy to care for and make excellent houseplants. Allow the top inch of soil to dry out before watering again.
Fertilize monthly during the growing season with a balanced fertilizer. Be sure to follow the directions on the package.
However, mealybugs and spider mites can be a problem. Plumosa ferns are not susceptible to many pests or diseases. If you see any pests, treat them immediately with an appropriate insecticide. These pests are usually found on the undersides of the leaves.
Adjust With The Environment
The Plumosa fern is a beautiful, delicate plant that can add a touch of elegance to any home. Here are a few tips on how to create the perfect environment for your Plumosa fern. But like all plants, the Plumosa fern needs the right environment to thrive.
Light
If you can provide a spot near a window with filtered light, that would be ideal. But avoid direct sunlight, as it can scorch the leaves. The Plumosa fern prefers bright, indirect light.
Water
Be sure to empty any water that collects in the saucer beneath the pot, as too much water can lead to root rot. The Plumosa fern needs to be kept moist, but not wet. Water the plant when the top inch of soil is dry.
Humidity
You can also mist the leaves of the plant occasionally to provide extra moisture. This plant loves humidity, so if your home is on the dry side, you may want to consider investing in a humidifier.
Temperature
A room temperature of 65-75 degrees Fahrenheit is ideal. The Plumosa fern prefers warm temperatures, so keep it away from drafts and cold windows.
With a little care, your Plumosa fern will thrive and add a touch of beauty to your home.
Check Now or Regret Later
If you’re thinking about adding a plumosa fern to your home, you may want to act fast. These beautiful plants are becoming increasingly popular, and they’re not always easy to find.
Plumosa ferns are native to tropical and subtropical regions, so they’re used to warm weather. They thrive in bright, indirect sunlight and prefer to be kept on the drier side.
If you can provide these conditions, a plumosa fern is a low-maintenance plant that’s perfect for beginners. They’re also relatively inexpensive, so you won’t have to break the bank to add one to your collection.
Act now if you’re interested in owning a plumosa fern, because they may not be available for long.
Don’t Panic
Here are some tips on how to care for your plumosa fern: When it comes to houseplants, there are few that are as easy to care for as the plumosa fern. Also known as the asparagus fern, this plant is perfect for those who want to add a touch of greenery to their home without having to put in a lot of effort.
If you can provide it with a few hours of direct sunlight each day, that would be ideal. Light: The plumosa fern does best in bright, indirect light. However, this plant can also tolerate low light conditions, so don’t worry if you can’t provide it with perfect lighting.
Water: The plumosa fern likes to be kept moist, but not soggy. Water it when the top inch of soil feels dry to the touch. Be sure to empty any water that collects in the saucer beneath the pot, as this can lead to root rot.
Fertilizer: You can fertilize your plumosa fern once a month during the growing season (spring and summer). Use a water-soluble fertilizer and follow the directions on the package.
With just a little bit of care, your plumosa fern will thrive and add a touch of beauty to your home.
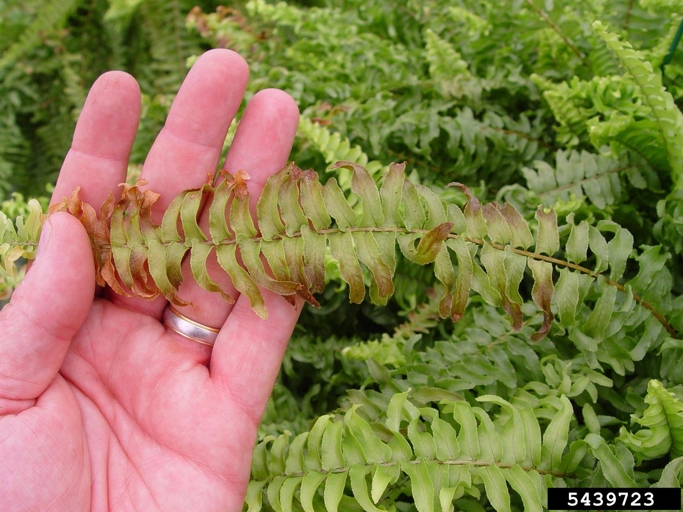
1. Why is my plumosa fern turning yellow?
There are a few reasons why this may happen, including too much or too little water, exposure to drafts, or a lack of nutrients. However, sometimes these leaves can turn yellow, which can be concerning for owners. Plumosa ferns are a type of houseplant that is known for its beautiful, cascading leaves.
Allow the top few inches of soil to dry out before watering again. These plants like to be kept moist, but not soggy. If your plumosa fern is turning yellow, the first thing you should check is the watering schedule. On the other hand, if the leaves are dry and crispy, this indicates that the plant is not getting enough water. If the leaves are yellow and wilted, this is a sign of overwatering.
These ferns prefer warm, humid conditions, so a sudden blast of cold air can cause the leaves to turn yellow and drop off. Make sure to keep your plumosa fern away from any windows or doors that may let in a draft. Another possible reason for yellowing leaves is exposure to drafts.
If you notice that the leaves are starting to yellow, give your fern a dose of liquid fertilizer and see if that makes a difference. These plants need to be fertilized every few weeks during the growing season. Finally, a lack of nutrients can also cause the leaves of a plumosa fern to turn yellow.
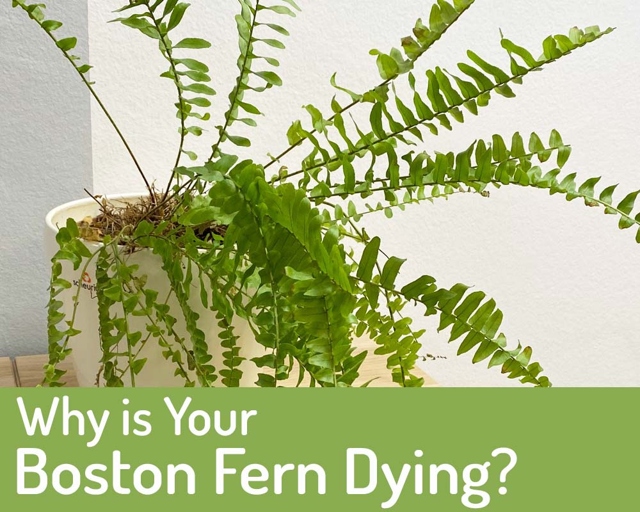
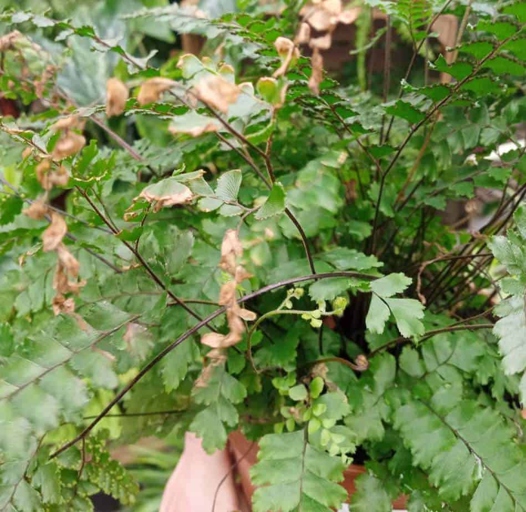
2. Why is my plumosa fern turning brown?
If your plumosa fern is turning brown, it is likely due to one of three reasons: too much sun, not enough water, or pests.
The fern needs bright, indirect light to thrive, so if it is in a spot that is too sunny, it will start to suffer. Too much sun can cause the leaves of the plumosa fern to turn brown and dry out.
Not enough water is another common reason for a plumosa fern to turn brown. If the soil is allowed to dry out, the leaves will start to turn brown. These plants like to be kept moist, so be sure to water them regularly.
These pests can suck the moisture out of the leaves, causing them to turn brown and dry out. Pests can also cause a plumosa fern to turn brown. If you see any pests on the plant, such as aphids, mealybugs, or spider mites, be sure to remove them right away.
3. Is plumosa fern poisonous to cats?
While the plumosa fern is not poisonous to cats, it can cause gastrointestinal upset if they eat too much of it. If you have a cat that likes to nibble on your plants, it’s best to keep this one out of reach.
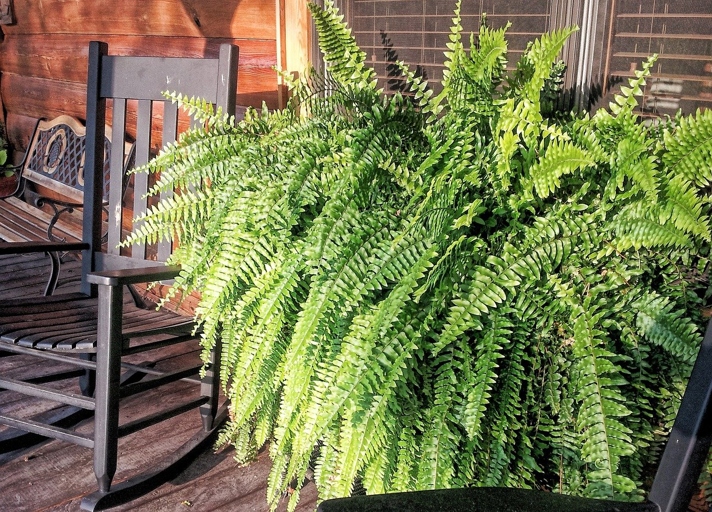
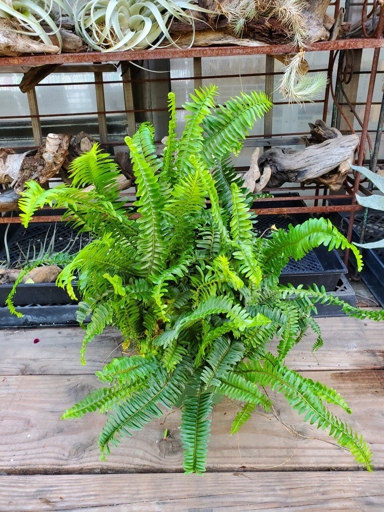
4. Plumosa fern vs Asparagus fern
If you’re looking for a feathery, delicate fern to add to your indoor plant collection, you may be wondering if you should get a plumosa fern or an asparagus fern. Both of these ferns have a similar appearance and can be difficult to care for, so it’s important to do your research before making a purchase.
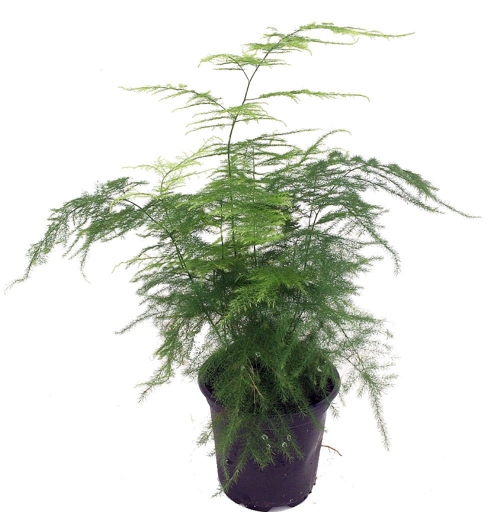
They can grow up to 2 feet tall and wide, and prefer bright, indirect light. Plumosa ferns are native to South America and have long, thin leaves that resemble feathers. These ferns are also known for being drought-tolerant, so they’re a good option for those who forget to water their plants regularly.
Asparagus ferns, on the other hand, are native to Africa and have shorter, thicker leaves. These ferns are more sensitive to drought, so they need to be watered more frequently than plumosa ferns. They can grow up to 3 feet tall and wide, and prefer shady, humid conditions.
If you’re looking for a low-maintenance plant that can tolerate some neglect, go for a plumosa fern. So, which fern is right for you? If you’re willing to put in a little extra effort to keep your plant healthy, an asparagus fern may be a better option.
Acquiring Your Own Plumosa Fern
If you’re looking for a plant that will add a touch of elegance to your home, the plumosa fern is a great option. This fern is relatively easy to care for, and it can thrive in a variety of environments. Here’s what you need to know about acquiring and caring for your own plumosa fern.
These plants are typically very affordable, and they’re easy to find. When it comes to acquiring a plumosa fern, your best bet is to purchase one from a nursery or garden center. Once you have your fern, it’s important to choose the right spot for it in your home.
If you can provide these conditions, your fern will thrive. It also needs to be in a spot where the temperature is relatively consistent. The plumosa fern prefers bright, indirect light.

These plants don’t require a lot of water, so you only need to water them about once a week. Caring for a plumosa fern is relatively simple. It’s important to let the soil dry out between waterings to prevent root rot. Plumosa ferns also benefit from being misted with water occasionally.
If you provide the right conditions and care for your plumosa fern, it will thrive for many years. This plant is a great way to add a touch of elegance to your home.
Frequently Asked Questions
1. What is a plumosa fern?
A plumosa fern is a type of fern that is characterized by its delicate, feathery leaves. It is a popular plant for both indoor and outdoor gardens.
2. Where do plumosa ferns come from?
Plumosa ferns are native to tropical and subtropical regions of the world. They are commonly found in South America, Africa, and Australasia.
3. How do I care for a plumosa fern?
Plumosa ferns are relatively easy to care for. They prefer moist, well-drained soil and bright, indirect light. Water the fern regularly, and mist the leaves occasionally to increase humidity.
4. What are the common problems with plumosa ferns?
The most common problem with plumosa ferns is browning of the leaves. This is usually caused by too much direct sunlight or not enough humidity.
5. How often do I need to fertilize a plumosa fern?
Fertilize your plumosa fern every two weeks during the growing season with a balanced liquid fertilizer.
Final thoughts
If you’re looking for a plant that’s both unique and easy to care for, the plumosa fern is a great option. With its delicate, feathery leaves, it adds a touch of elegance to any space. And, as long as you keep it in a bright spot and water it regularly, it will thrive. So whether you’re a plant novice or a seasoned pro, the plumosa fern is a great choice for your home.