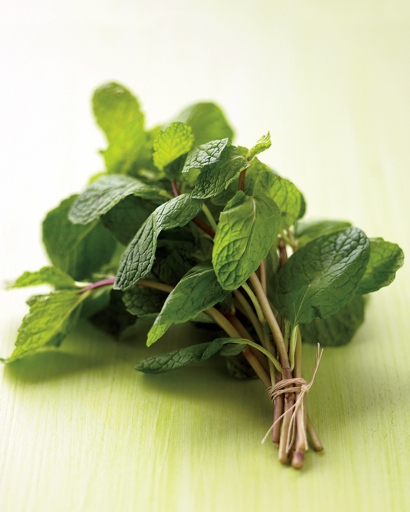
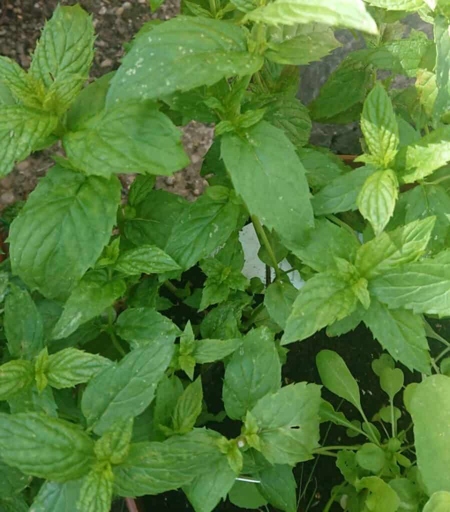
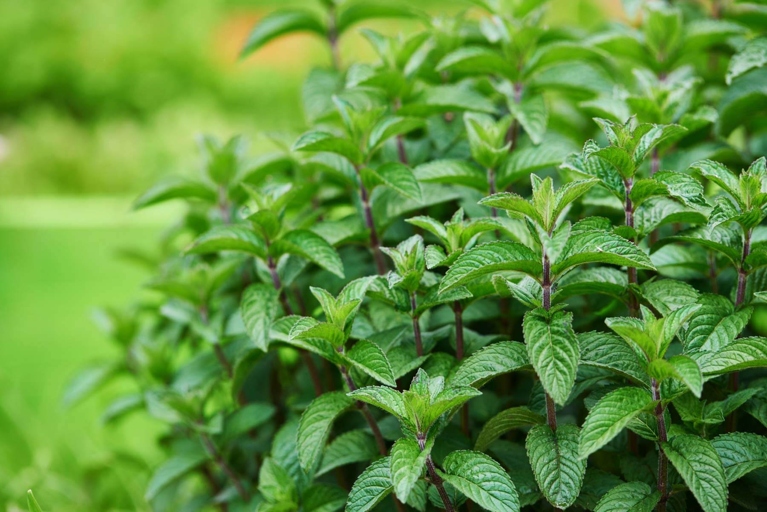
If you’re looking to add some mint to your garden, you’re in luck. Transplanting mint is a relatively easy process that can be done in just a few steps. Follow the instructions below and you’ll have mint growing in no time.
Signs That Your Mint Needs A Larger Pot
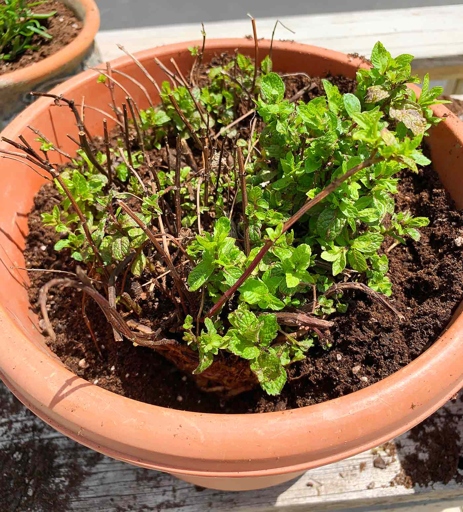
If your mint is growing in a pot that is too small, it will start to show signs of stress. If you see these signs, it’s time to transplant your mint into a larger pot. The leaves will become smaller and the plant will become leggy.

Fill in around the plant with fresh potting mix. Gently remove the plant from its current pot and place it in the new pot. To transplant your mint, water the plant thoroughly the day before you plan to move it. Water the plant well and place it in a bright spot. This will help to reduce the stress of the transplant.
Keep an eye on it for the first few days and water as needed. After a week or so, your mint should be settled in and ready to continue growing. Your mint will need some time to adjust to its new home.
[1] Uneven Green Growth
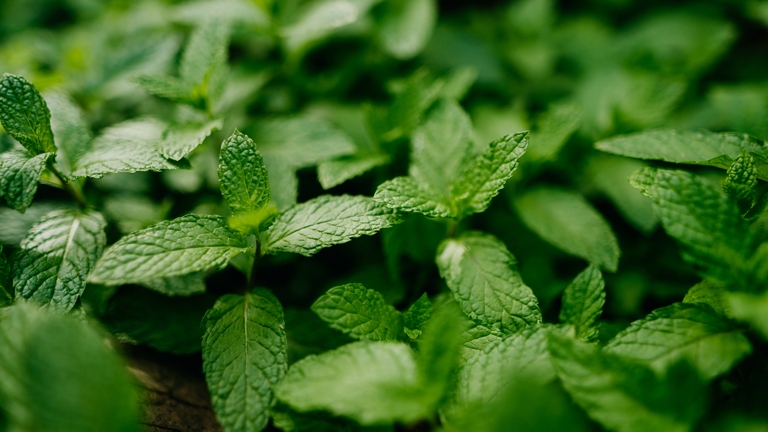
The leaves of the mint plant are very sensitive to light and will often etiolate, or stretch, when they don’t receive enough light. Uneven green growth is a common problem when transplanting mint. This can cause the plant to become lopsided or have an uneven growth habit.
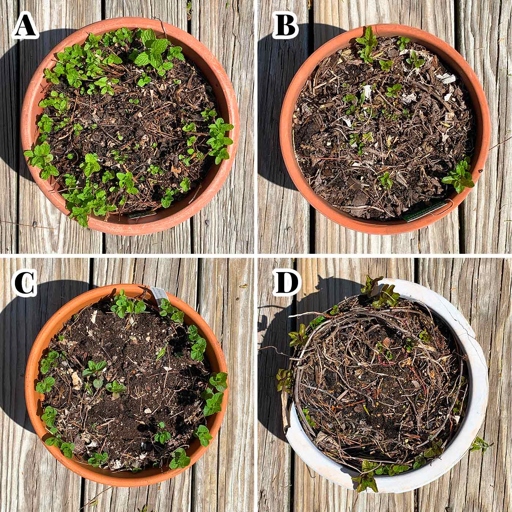
If you are transplanting mint from a pot, be sure to loosen the roots before planting. Mint plants can also benefit from being transplanted into a larger pot or container. To avoid uneven green growth, make sure to plant mint in an area that receives full sun.
[2] Central Wilting and Die-Back of the Mint Plant
Central wilting and die-back is caused by a number of factors, including improper watering, over-fertilization, and pests. Mint plants are susceptible to a number of diseases, including central wilting and die-back.

Inspect your plants regularly for pests, and treat them accordingly. Do not over-fertilize your mint plants, as this can lead to nutrient burn. Allow the soil to dry out between watering. To prevent central wilting and die-back, water your mint plants deeply and regularly.
[3] Leggy Growth
Here’s how to transplant mint so it will thrive in your garden: Mint is a fast-growing, aromatic herb that’s easy to propagate from stem cuttings.

Fill a pot or container with well-draining potting mix. 1.
Cut a 4-inch stem from a healthy mint plant. 2.
3. Remove the bottom leaves from the stem, and dip the cut end in rooting hormone.
Plant the stem in the potting mix, and water well. 4.
Place the pot in a bright, sunny spot. 5.
6. Keep the soil moist, but not soggy.
In about 2-3 weeks, you should see new growth. 7.
Once the plant is established, you can transplant it into your garden. 8.
Mint is a versatile herb that can be used in a variety of dishes, from savory to sweet. If you’re looking to add some mint to your garden, propagation by stem cuttings is the easiest way to do it. With a little patience and care, you’ll have a thriving mint plant in no time. It’s also a beautiful plant, with its bright green leaves and purple flowers.
[4] Slow or Stunted Growth
Mint is a fast-growing plant, but sometimes it can become stunted or slow-growing. This can be due to a number of factors, including poor soil, too much shade, or lack of water. If your mint plant is growing slowly or not at all, there are a few things you can do to help it along.
First, check the soil. Amend the soil with some compost or other organic matter to help improve drainage. Mint prefers loose, well-drained soil. If the soil around your plant is compacted or waterlogged, it could be causing the plant to grow slowly.
Move the plant to a sunnier spot, or add some artificial lighting. If it’s growing in too much shade, it may not have enough energy to grow. Second, make sure the plant is getting enough light. Mint needs at least six hours of sunlight per day to thrive.

Mint likes to stay moist, but not soggy. Use a balanced fertilizer and follow the directions on the package. Finally, make sure the plant is getting enough water. If the plant is still not growing, you may need to fertilize it. Water the plant deeply once or twice a week, and mist the leaves regularly.
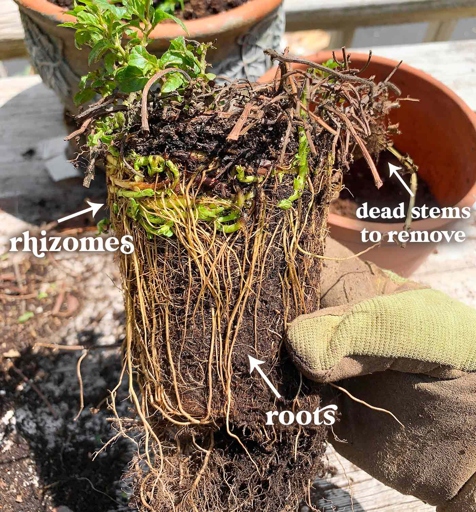
[5] Roots Emerging from Drainage Holes
Gently loosen the roots and then place the plant in the hole. You’ll also want to make sure the new spot gets plenty of sunlight. Fill in the hole with soil and water the plant well. When you’re ready to transplant your mint, start by finding a new home for it that has well-drained soil. Once you’ve found the perfect spot, dig a hole that’s big enough to accommodate the roots of your plant.

Just make sure to keep an eye on the plant and water it regularly. With a little care, your mint will thrive in its new home. Mint is a hardy plant, so it will quickly start to grow in its new home. You may see roots emerging from the drainage holes in the pot. This is perfectly normal and nothing to worry about.
[6] Leaf Yellowing
If you notice your mint plants starting to yellow, take a closer look to try and identify the problem. Leaf yellowing can be caused by a number of different factors, including nutrient deficiencies, pests, or disease.

Make sure you are fertilizing your plants regularly and giving them enough water. If the leaves are yellowing and falling off, it could be a sign of a nutrient deficiency. If the leaves are yellowing but not falling off, it could be a sign of a pest problem. If you see any, treat the plants with an appropriate insecticide. Inspect the leaves carefully for any signs of insects or damage. Inspect the plant for any signs of fungal growth or other problems. If you see any, remove the affected leaves and treat the plant with a fungicide. Finally, if the leaves are yellowing and the plant is wilting, it could be a sign of disease.
[7] Other Symptoms
Other Symptoms
These include: In addition to the physical symptoms of transplanting mint, there are also a few other symptoms that can occur.
-Mint plants may experience a period of shock after transplanting. The plant may appear wilted or droopy during this time. This is normal and will typically only last for a few days.
-Mint plants may also experience a period of reduced growth after transplanting. This is also normal and will eventually resolve itself.
-If the plant is not receiving enough water, it may experience leaf drop. This is a sign that the plant is stressed and needs to be watered more frequently.
This is a sign that the plant needs to be moved to a location that receives more light. -If the plant is not receiving enough light, it may experience stunted growth.
Other Justifications for Transplanting or Repotting your Mint
If your mint is looking a little worse for wear, it may be time to transplant or repot it. But even if your mint is healthy, there are a few other good reasons to give it a new home.

By transplanting it into a larger pot, you can give it more room to grow without it taking over your entire garden. Mint can be quite aggressive, and it can quickly take over a small pot. If you want to keep your mint under control, transplanting it into a larger pot is a good way to do it.
If you’re moving to a new house or apartment, you’ll need to transplant your mint anyway. And if you have mint that’s growing in a spot that gets too much sun or too much shade, transplanting it to a more suitable location can help it thrive.
Just be sure to transplant the divisions into large pots, as they’ll quickly take over small ones. Mint plants can become quite large, and dividing them will give you more plants to enjoy. Finally, if you want to divide your mint plants, transplanting is the best way to do it.
Provide your Mint Plant with New Soil and Nutrients
When your mint plant becomes rootbound or the leaves begin to yellow, it’s time to transplant it to a new pot with fresh soil. Follow these steps to ensure a successful transplant:
Choose a pot that is at least twice the size of the current pot. 1.
Fill the new pot with fresh, well-draining potting mix. 2.
Gently remove the mint plant from its current pot. 3.
4. loosen the roots and replant in the new pot.
Water well and place in a sunny spot. 5.
Your mint plant will thank you for the fresh soil and nutrients!
Replace Its Plastic Pot with a More Attractive One
Here’s a step-by-step guide to transplanting mint: This can be a great way to show off your plant and make it more eye-catching. If you’re looking for a way to spruce up your mint plant, one option is to transplant it into a more attractive pot.
This will give the roots room to grow. 1. Choose a new pot that is slightly larger than the current one.
Add some fresh potting soil to the new pot. 2.
Gently remove the mint plant from its current pot. 3. Be careful not to damage the roots.
4. Place the mint plant in the new pot and fill in around it with potting soil.
Water the plant well and place it in a sunny spot. 5.
With a little bit of care, your mint plant will soon be thriving in its new home.
To Separate Different Mint Varieties
There are many different varieties of mint, and they can be easily separated by their different colors and flavors. Mint is a versatile and hardy herb that can be used in many different dishes and drinks.
Each variety has a different flavor that can be used in different ways. Peppermint is the strongest of the three and has a cooling, refreshing flavor that is perfect for adding to desserts or cocktails. Mint can be separated into three different categories: spearmint, peppermint, and chocolate mint. Spearmint is the mildest of the three and has a refreshing flavor that is perfect for adding to iced tea or lemonade. Chocolate mint is the sweetest of the three and has a rich, chocolatey flavor that is perfect for adding to coffee or hot chocolate.
Once you have identified the different flavors, you can use them in different recipes or drinks. Taste a small piece of each leaf to identify the different flavors. Rub the leaves between your fingers to release the essential oils and smell each one. To separate different mint varieties, start by snipping off a small piece of each plant.
Mint Transplanting Supplies
Here is a list of what you will need: When it comes to transplanting mint, you will need a few supplies to get the job done.
-A pot or container that is at least 6 inches wide and 6 inches deep
-Potting soil
-A spade or shovel
-A watering can
Water the plant well and place it in a sunny spot. To transplant mint, first dig up the plant with a spade or shovel, being careful not to damage the roots. Then, place the plant in the new pot or container and fill it with potting soil.
(1) Pruning Tool
A pruning saw is the best tool for the job, as it can cut through the roots easily. When transplanting mint, it is important to have the right tools. A spade or shovel can also be used, but it may take longer and be more difficult.
Once you have the right tool, you need to prepare the plant. Water the plant well. Cut the roots back to about 6 inches, and then dig a hole that is twice as wide and deep as the root ball. Place the mint plant in the hole, and then fill it in with soil.
It is important to prune the mint plant after transplanting. This will help the plant to recover from the transplanting process and will promote new growth. Cut back the stems by about half, and remove any dead or damaged leaves.
(2) Pot with Drainage Holes
When transplanting mint, it is important to use a pot with drainage holes. Mint is a hardy plant and can tolerate a wide range of conditions, but it does not like to sit in wet soil. This will help to prevent the roots from rotting. Be sure to water the plant regularly, but allow the soil to dry out between waterings.
(3) Potting Soil
Second, you want to make sure that the soil is rich in organic matter. Mint prefers a slightly acidic environment, so if your potting soil is not naturally acidic, you may need to add some acidifying agent to it. When it comes to potting soil, there are a few things to keep in mind. Finally, you want to make sure that the soil is slightly acidic. Mint does not like to sit in wet soil, so drainage is key. This will help the mint roots to establish themselves quickly. First, you want to make sure that the soil is loose and well-draining.
Finally, you’ll want to water the plant well and place it in a location that receives indirect sunlight. Then, you’ll want to fill the pot with the potting soil, making sure to leave enough room at the top for the roots. First, you’ll want to choose a pot that is large enough to accommodate the roots of your mint plant. Next, you’ll want to gently loosen the roots of your mint plant and place it in the pot. Once you have the right potting soil, it’s time to transplant your mint.
(4) Other Things You’ll Need
You’ll also need a new pot or container for your mint, and some fresh potting soil. In addition to mint, you’ll need a spade, a shovel, and a garden hose.

If you’re transplanting mint from your garden, be sure to dig up a large enough root ball to fit comfortably in your new pot. Gently loosen the roots before planting, and water well.
Gently loosen the roots before planting, and water well. If you’re transplanting mint from a friend or nursery, be sure to ask for a plant that’s already well-rooted.
How Big of A Pot Do I Need?
This will give the roots plenty of room to grow and the plant will stay healthy. Otherwise, the roots will become constricted and the plant will become stressed. When you’re transplanting mint, you need to make sure you have a pot that’s big enough. A good rule of thumb is to choose a pot that’s about twice the size of the pot the mint is currently in.
Step-By-Step Instructions for Transplanting Your Mint
If you’re looking to transplant your mint, follow these simple steps and you’ll have your mint plant moved in no time.
Start by preparing the new pot or area where you’ll be transplanting your mint. Make sure the pot has drainage holes and is filled with fresh, quality potting mix. 1.
Gently remove your mint plant from its current pot. Be careful not to damage the roots. 2.
Water well. Place the plant in the new pot or area, and fill in around it with fresh potting mix. 3.

Place the pot in a sunny spot and keep the soil moist. 4. Your mint plant should be well-established in its new home within a few weeks.
Step #1: Water Your Mint Plant
Otherwise, the plant will be stressed and more likely to die. If you’re transplanting your mint plant, the first step is to water it. You want to make sure the plant is well-watered before you start digging it up.
Water the plant until the soil is saturated and water is running out of the drainage holes. To water your mint plant, simply give it a good soaking. Let the plant drain for a few minutes, then water it again. Repeat this process until the plant is thoroughly wet.
Step #2: Gather Everything You Need
Before you can start transplanting your mint, you need to gather everything you need. This includes a new pot or container, some fresh potting mix, and some water.
If it doesn’t, your mint will quickly become waterlogged and could die. You’ll also need to make sure that the new pot or container has drainage holes in the bottom.
Once you have everything you need, it’s time to start transplanting your mint.
Step #3: Labeling New Containers
If you’re transplanting multiple mint plants, be sure to label each container with the name of the plant. When you’re ready to label your new containers, start by finding a permanent marker. Once you have your marker, write the name of the plant on the container. You’ll want to use a marker that won’t fade over time, so that you can easily identify your mint plants in the future.
Step #4: Prep the Work Station
This includes finding a level spot in your yard that gets at least six hours of sunlight a day, and clearing the area of any debris. Once you have found the perfect spot, it’s time to start digging. Assuming you have already gathered all the necessary tools, the next step is to prep your work station.

Finally, add some compost or manure to the hole to give the plant a boost of nutrients. Use a shovel to dig a hole that is twice the size of the mint plant’s root ball. Then, loosen the roots of the plant so they can spread out in the new hole.
Step #5: Prepare the New Container
Water the mint well, and then place it in a spot that gets partial sun to full shade. Fill the pot with a high-quality potting mix, and make sure the plant is at the same depth in the new pot as it was in the old one. If you’re transplanting your mint into a pot, make sure it has drainage holes in the bottom.

Water well. Set the plant in the hole, and backfill with soil. If you’re transplanting mint into the ground, choose a spot that gets partial sun to full shade and has well-drained soil. Amend the soil with compost or other organic matter, and dig a hole that’s twice as wide and just as deep as the mint’s root ball.
Step #6: Remove Your Mint Plant
Mint is a fast-growing, invasive plant that can quickly take over your garden. Then, cut the plant back to the ground, making sure to remove all the leaves. Finally, dispose of the plant in the trash or compost bin. To remove your mint plant, first dig up the roots.
Step #7: Clean Up and Tidy your Plant
If the roots are very long, you can trim them back a bit. Gently remove any old leaves or stems that are brown or yellow. After you have removed your mint plant from its old pot, it is time to clean it up. Once your plant is cleaned up, it is time to move it to its new home.
Step #8: Replant Your Mint
Mint is a fast-growing herb that can quickly become overcrowded in its pot. When this happens, it’s time to transplant your mint into a larger pot or into the ground.
Here’s how to do it:
Water your mint plant the day before you plan to transplant it. 1. This will help the plant to recover from the stress of being moved.
Choose a new pot that is at least twice the size of the current one, or prepare a spot in your garden. 2.
Gently remove the mint plant from its current pot. 3. Be careful not to damage the roots.
Place the plant in the new pot or in the prepared spot in your garden, and backfill with soil. 4.
Water well and keep the soil moist until the plant is established. 5.
With a little care, you can successfully transplant your mint plant and keep it growing strong.
Step #9: Press Down the Soil
Use your hands to press down the soil around the plant. This will help the plant to take root and grow. Once the plant is in place, water it well. Be sure to pack the soil tightly so that the plant will be secure. After you have placed your mint plant in the hole, it is time to press down the soil.
Step #10: Place the Pot in an Ideal Position
Make sure the plant is at the same depth it was in the old pot. Once the plant is in the new pot, water it well. After you have chosen the perfect spot for your mint plant, it is time to transplant it. Gently remove the plant from its current pot and place it in the new one.
Tips for Reducing Transplant Shock
To prevent transplant shock, water the plant well before transplanting, and water it immediately after transplanting. Transplant shock is when a plant’s roots are disturbed, which can cause the plant to wilt, lose leaves, and even die. When transplanting mint, it is important to take measures to prevent transplant shock. It is also important to mulch the plant to help retain moisture.
Frequently Asked Questions
1. How do I know if my mint needs to be transplanted?
If the plant is pot bound (roots are growing out of the drainage holes), it’s time to transplant. You can also check the health of the plant. If the leaves are yellow or the plant is wilting, it’s a sign that the plant is stressed and needs to be transplanted.
2. When is the best time to transplant mint?
The best time to transplant mint is in the spring or fall. Mint is a hardy plant, so it can be transplanted even if the weather is not ideal.
3. How do I prepare the new pot for my mint plant?
Choose a pot that is at least 2 inches wider and 2 inches deeper than the current pot. Fill the pot with potting soil and make a hole in the center for the plant.
4. How do I transplant my mint plant?
Carefully remove the plant from the current pot and loosen the roots. Place the plant in the new pot and fill in around the plant with potting soil. Water the plant well.
5. What are some tips for caring for my transplanted mint plant?
Mint is a fast-growing plant, so you will need to water it regularly. Fertilize the plant every 2 weeks with a water-soluble fertilizer. Place the pot in a sunny spot.
Final thoughts
Mint is a popular herb that is used in many dishes and drinks. It is easy to grow, but it can be difficult to transplant. These steps will help you to successfully transplant your mint. First, you will need to water the plant well. Next, you will need to dig up the plant and replant it in a new pot or in the ground. Be sure to give it plenty of room to grow. Finally, water the plant well and keep it in a sunny spot. With a little care, your mint will thrive in its new home.