If your bird of paradise is starting to look a little pot-bound, or if it’s been a while since you last repotted it, it might be time to give it a fresh start. Here’s everything you need to know about when and how to repot a bird of paradise.
When Should I Transplant My Bird of Paradise?
But when is the best time to do this? If your bird of paradise is pot-bound, you’ll need to transplant it into a larger pot.

This is when the plant is just starting to come out of its winter dormancy. Early spring is the best time to transplant your bird of paradise.
You’ll also need to use a well-draining potting mix. Before you transplant, make sure you have a pot that is at least 2 inches wider and 2 inches deeper than the pot your bird of paradise is currently in.
loosen the roots and replant in the new pot. Water well and keep the plant in a warm, sunny spot. To transplant, gently remove your bird of paradise from its current pot.
How to Repot A Bird of Paradise
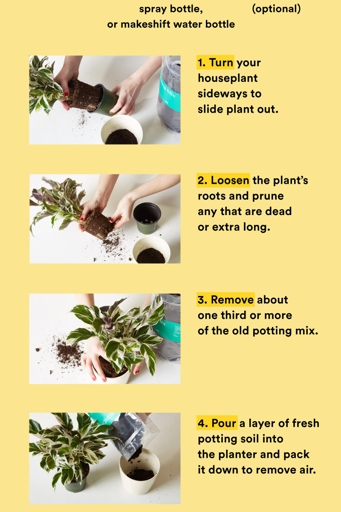
Here’s a step-by-step guide on how to do it: If your bird of paradise is looking a little pot-bound, it may be time for a repot.
Choose a new pot that is about 2-3 inches wider than the current pot. 1.

Add fresh potting mix to the new pot. 2.
3. Gently remove the plant from the current pot, being careful not to damage the roots.
Place the plant in the new pot and fill in around the roots with fresh potting mix. 4.
Water the plant well and place it in a bright spot. 5.
Your bird of paradise will thank you for giving it some extra room to grow!
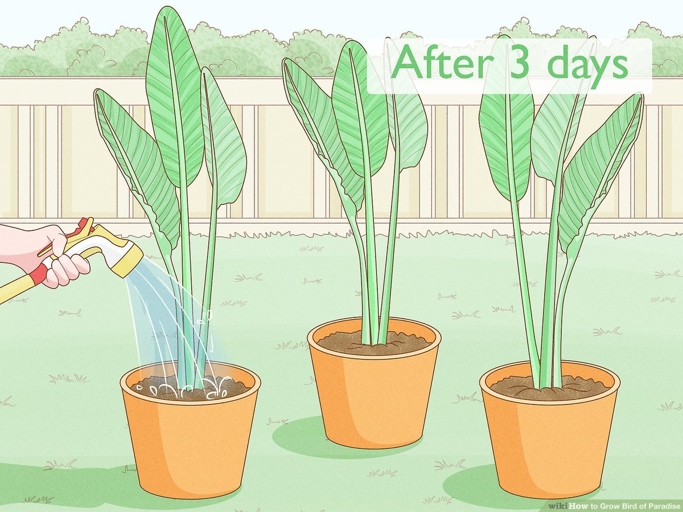
Step 1: Water the plant
It also helps to prevent the plant from drying out during the repotting process. This is important because it helps to loosen the roots and make the plant easier to handle. When it comes to repotting bird of paradise, the first step is always to water the plant.
Be careful when doing this, as the roots can be fragile. Once the plant has been watered, the next step is to remove it from its current pot. Gently loosen the roots and then lift the plant out of the pot.
Gently place the plant in the new pot and then water it again. Once the plant is out of the pot, you can begin to repot it. Choose a new pot that is slightly larger than the old one, and fill it with fresh potting soil.
Now that the plant is repotted, it is important to give it time to adjust to its new home. After a few weeks, you can begin to fertilize it to help it grow even more. Place it in a bright, sunny spot and water it regularly.
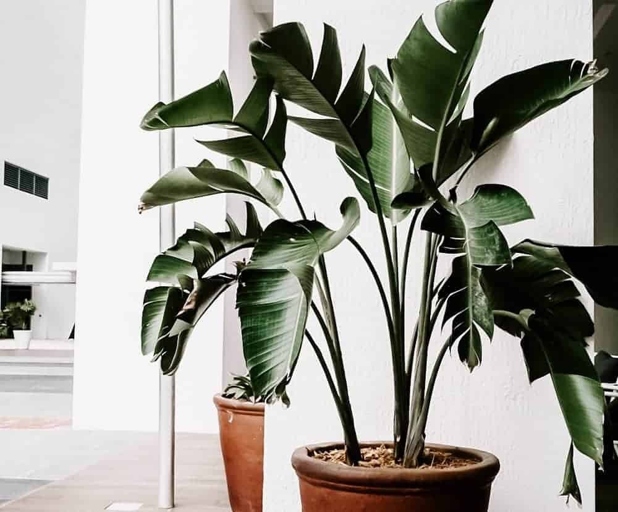
Step 2: Select a larger container
If your bird of paradise is getting too big for its pot, it’s time to repot. Follow these steps to ensure a successful transplant.

If the pot is too large, the soil will stay too wet and the roots will rot. Choose a pot that is at least 2 inches wider and 2 inches deeper than the current pot. If the pot is too small, the roots will become crowded and the plant will be stressed.
Fill the new pot with a high-quality potting mix. If you’re not sure what to use, ask for help at your local nursery or garden center.
Carefully remove the plant from its current pot. Gently loosen the roots and remove any old, dead, or diseased roots.
Place the plant in the new pot and fill in around it with potting mix. Firm the mix gently with your hands to remove any air pockets.
Keep an eye on it over the next few weeks and water as needed to keep the soil moist but not soggy. Water the plant well and place it in a bright, warm spot.
With a little care, your bird of paradise will soon be thriving in its new home.
Step 3: Prepare a work area
You’ll need a few supplies, including a new pot, fresh potting mix, and a plant food. When you’re ready to repot your bird of paradise, choose a well-lit spot in your home and clear out a work area.
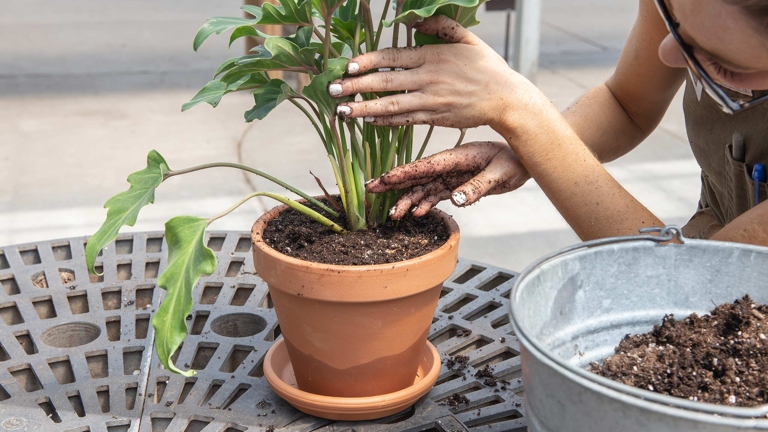
To prepare your pot, add a layer of fresh potting mix to the bottom. Gently firm the potting mix around the plant and water it well. Then, add your bird of paradise plant.
Place it in a well-lit spot in your home and enjoy your beautiful bird of paradise! Once your plant is in its new pot, give it a good watering and fertilize it with a plant food.
Step 4: Add New Potting Mix to The New Container
If your bird of paradise is looking a little pot-bound, it might be time for a repot. Follow these steps and your plant will be thriving in no time!
Be sure to use a well-draining mix, as bird of paradise plants are susceptible to root rot. Once the new potting mix is in place, water your plant well and give it a little time to adjust to its new home. The fourth and final step is to add new potting mix to the new container.
Step 5: Remove the Plant from The Current Container
Once the plant is out of the pot, inspect the roots and trim away any that are damaged or dead. If the roots are tightly bound, you may need to use a sharp knife to cut through them. When you’re ready to repot your bird of paradise, the first step is to remove the plant from its current container. Gently loosen the roots with your hands, then lift the plant out of the pot.
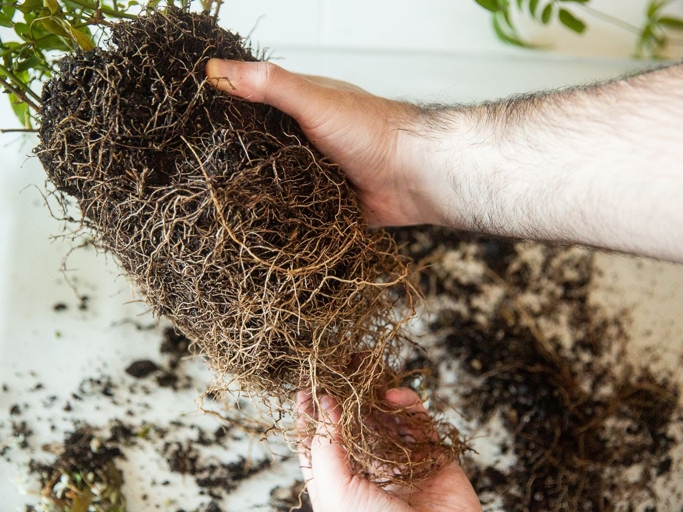
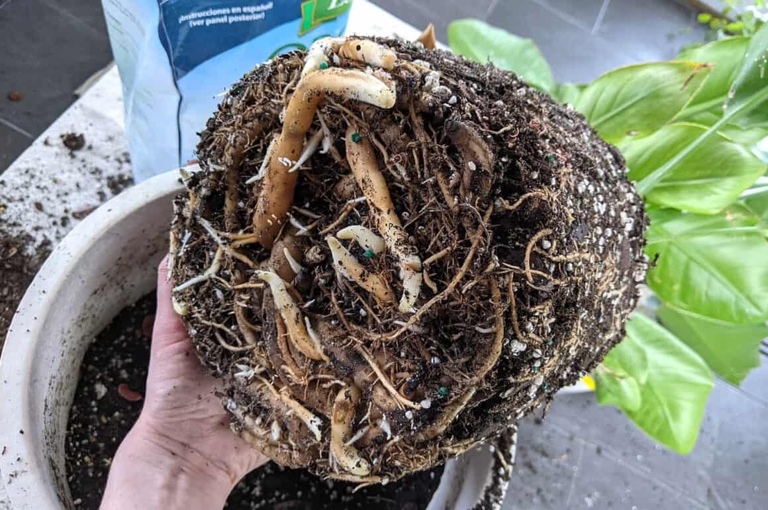
Step 6: Loosen the Plant’s Roots to Remove Old Potting Soil
If your bird of paradise is pot bound, you’ll need to loosen the roots to remove the old potting soil. Gently remove the plant from its pot and loosen the roots with your fingers. If the roots are too tightly bound, you can use a sharp knife to carefully cut through them. Be careful not to damage the roots.
Once the roots are loosened, you can repot the plant in fresh potting soil. Water the plant well and allow it to drain before putting it back in its pot. Be sure to use a pot that is only slightly larger than the root ball.
Step 7: Add the Plant to The New Container
If you’re moving your bird of paradise to a new pot, make sure the pot is only slightly larger than the current one. This will help the plant adjust to its new home more easily.
Gently press the mix around the plant’s roots, making sure they’re covered. To add the plant to the new pot, first loosen the roots around the edge of the current pot. Then, place the plant in the new pot and fill it with fresh potting mix.
Keep an eye on it over the next few weeks, and give it a little extra water if the soil starts to dry out. Once the plant is in its new pot, water it well and place it in a bright, sunny spot.
Step 8: Water the Plant
Just make sure to water deeply and less often. Allow the plant to dry out completely between watering. Water your plant when the top 1-2 inches of soil are dry to the touch. Bird of paradise plants are drought tolerant, so don’t worry about overwatering.
Reduce Repotting Shock
First, try to choose a pot that’s only slightly larger than the current one. A pot that’s too large can cause the roots to rot. If you’re moving your bird of paradise to a new pot, there are a few things you can do to reduce repotting shock. Second, water the plant well before repotting to help reduce stress. And finally, be sure to use a light, well-draining potting mix.
If you follow these tips, you can help your bird of paradise adjust to its new pot with minimal stress.
Know When to Transplant
You’ll want to repot your plant every two to three years, in the springtime. When it comes to transplanting your bird of paradise, timing is everything. Keep an eye on your plant, and when you notice the roots starting to come out of the drainage holes, it’s time for a transplant.

First, choose a new pot that is about two inches wider than the current pot. Fill in around the plant with fresh potting mix, and then water well. The process of transplanting your bird of paradise is relatively simple. loosen the roots slightly, and then place the plant in the new pot. Fill the new pot with fresh potting mix, and then gently remove your plant from the old pot.
Once it has settled in, it will be ready to show off its beautiful blooms once again. Your bird of paradise will need some time to adjust to its new home, so keep an eye on it for the first few weeks.
Try Not to Disturb Roots
This can be a delicate process, but it’s important to be careful so that you don’t damage the plant. When it comes to repotting bird of paradise, it’s important to try not to disturb the roots too much. Here are some tips on how to repot bird of paradise without disturbing the roots:
Use a sharp knife to carefully loosen the roots from the pot. 1.
Gently remove the plant from the pot, being careful not to damage the roots. 2.

Place the plant in the new pot, and fill in around the roots with fresh potting mix. 3.
Water the plant well, and then place it in a bright spot. 4.
By following these steps, you can repot bird of paradise without disturbing the roots too much. This will help to ensure that your plant continues to thrive.
Take As Many Roots as Possible
This usually happens every two to three years. It’s important to repot your bird of paradise when it becomes rootbound. When you repot, be sure to use a pot that’s only slightly larger than the current one. It’s also important to take care not to damage the roots when you repot.
Water well. Then, carefully remove the plant from the pot. Place it in the new pot, and fill in around the roots with fresh potting mix. To repot, first loosen the roots around the edge of the pot.
With proper care, your bird of paradise will thrive for years to come. This is normal and the plant will quickly bounce back. Your bird of paradise will likely lose some leaves after you repot it.
Remove The Dead Parts of The Plant
Here’s how: But before you do, you’ll need to remove the dead parts of the plant. If your bird of paradise plant is looking a little worse for the wear, it may be time to repot it.
These can be easily snapped off at the base. 1. Start by removing any dead leaves or stems.
Cut these away with a sharp knife. If they are brown or black, they are probably dead. Next, take a look at the roots. 2.
Finally, cut away any dead or dying flowers. 3. These can be tricky to remove, so be careful not to damage the healthy parts of the plant.
Follow the instructions in the article linked above to get your bird of paradise plant looking good as new! Once you’ve removed all the dead parts of the plant, you’re ready to repot it.
Do Not Transplant During Dormant Period
Repotting during the dormant period will help reduce stress on the plant and promote new growth. If you’re wondering when the best time to repot your bird of paradise is, the answer is simple: during the plant’s dormant period. This is typically from late fall to early spring.
Here are a few things to keep in mind when repotting your bird of paradise:
– Choose a pot that is only slightly larger than the current pot.
– Use a well-draining potting mix.
– Water the plant well before repotting.
– Be careful not to damage the roots when repotting.
Following these simple tips will help ensure that your bird of paradise thrives for years to come.
After Removing the Roots, Trim Some Leaves
After removing the roots, trim some of the leaves. When trimming the leaves, be sure to cut them back to the main stem, as this will help to encourage new growth. This will help the plant to focus its energy on growing new roots and will also make it easier to fit into the new pot.
Apply A Root Growth Promoter
If you want your bird of paradise to really take off, you should consider applying a root growth promoter. Here’s a quick guide on when and how to apply a root growth promoter to your bird of paradise. This will help encourage strong and healthy root growth, which is essential for a thriving plant.
When to Apply
This will give the roots a chance to absorb the nutrients and get a head start on the growing season. The best time to apply a root growth promoter is in the spring, before the plant starts actively growing.
How to Apply
You’ll want to follow the instructions on the packaging to determine how much to use and how to apply it. Root growth promoters come in a variety of forms, including powders, liquids, and pellets. In general, you’ll mix the root growth promoter with water and then pour it around the base of the plant. Be sure to water the plant thoroughly after applying the root growth promoter.
With a little help from a root growth promoter, your bird of paradise will be on its way to a healthy and prosperous growing season.
Water Thoroughly After Transplanting
Allow the water to drain completely before placing the plant in its new pot or container. Water your bird of paradise immediately after transplanting it. Use room temperature water and soak the roots thoroughly.
Be sure to allow the water to drain completely before placing the plant in its new pot or container so that the roots do not become waterlogged. Allowing the roots to soak in room temperature water will help them to adjust more quickly. It is important to water your bird of paradise thoroughly after transplanting it because the roots are delicate and need time to adjust to their new environment.
Does the Bird of Paradise Like to be Root Bound?
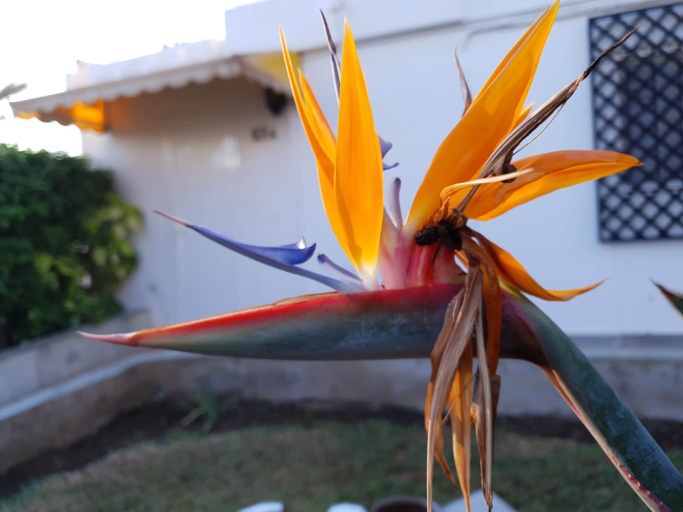
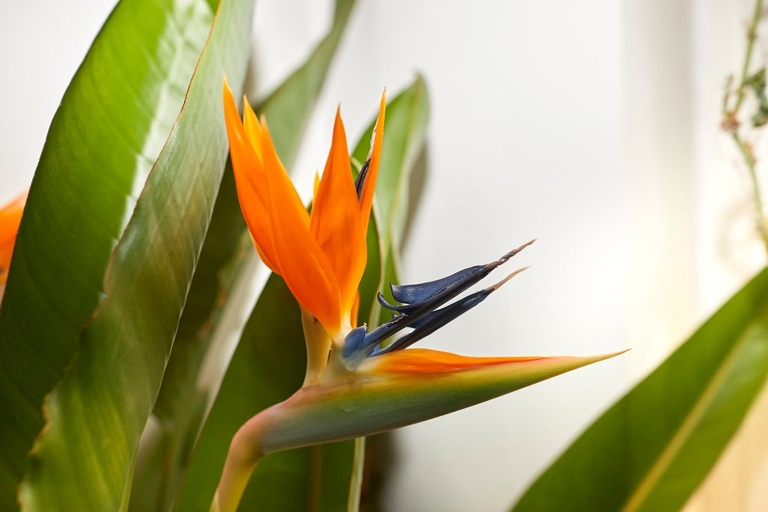
It is a member of the family Strelitziaceae and is closely related to the crane flower. The plant is an evergreen and can grow to be up to 10 feet tall. The plant blooms from late summer to early fall. The bird of paradise is a tropical plant that is native to South Africa. The bird of paradise is known for its beautiful flowers, which are white with blue or purple markings.

When the plant’s roots become crowded, it can lead to problems such as reduced growth, poor flowering, and even death. The best time to repot a bird of paradise is in the spring, before the plant starts to actively grow. If you think your bird of paradise is root bound, it’s important to repot it as soon as possible. The bird of paradise does not like to be root bound.
Should I water a Bird of Paradise after Repotting?
The answer is yes, you should water your bird of paradise after repotting. If you’ve just repotted your bird of paradise, you may be wondering if you need to water it. Here’s why:
When you repot a plant, you’re essentially giving it a fresh start. The roots have been disturbed, so they need time to adjust to their new environment. Watering helps the roots to settle in and start taking up nutrients from the soil.
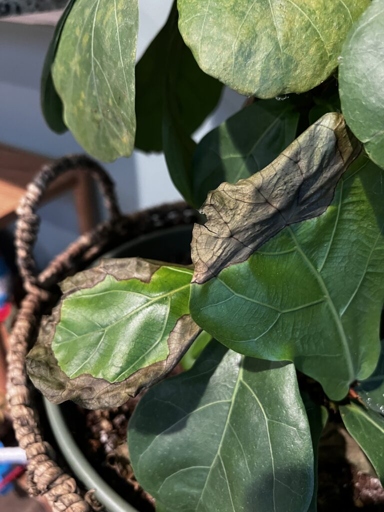
Watering helps to reduce the risk of transplant shock and ensures that your plant continues to thrive. Transplant shock can cause the leaves to turn yellow or brown, and the plant may stop growing. This is a condition that can occur when a plant’s roots are damaged or disturbed. Additionally, watering after repotting helps to prevent transplant shock.
Frequently Asked Questions
1. When is the best time to repot a bird of paradise?
The best time to repot a bird of paradise is in the spring, before the plant begins to actively grow.
2. Why does a bird of paradise need to be repotted?
A bird of paradise needs to be repotted because it will eventually outgrow its current pot. Repotting will give the plant more room to grow, and will also refresh the potting soil.
3. How often does a bird of paradise need to be repotted?
A bird of paradise should be repotted every two to three years.
4. What type of pot is best for a bird of paradise?
A bird of paradise does best in a pot that is slightly larger than its current pot. The pot should have drainage holes to allow excess water to drain out.
5. How do you repot a bird of paradise?
To repot a bird of paradise, start by removing the plant from its current pot. Then, loosen the roots and place the plant in the new pot. Fill the pot with fresh potting soil, and water the plant well.
Final thoughts
When it comes to repotting bird of paradise, the best time to do it is in the spring. This will give the plant time to adjust to its new home and get established before the hot summer months. Follow the steps outlined in this article and you’ll have your bird of paradise repotted in no time!